The favorite characters of many children and adults are penguins. Of course, from the cartoon "Madagascar". To turn the cartoon characters into reality and leave to guard the garden house - that's our task for today.
We will create penguins from plastic bottles: the material is common, easy to work with.
We should get these cute guys:
Penguins made of plastic bottles look great in the snow and with all their appearance remind of the imminent New Year.
Penguin from a plastic bottle: master class
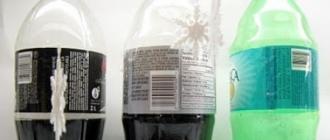
1. First we need a bottle. If you use a standard plastic bottle, for example, from under the oil, then the penguin will turn out to be very thin. It is better to use "pot-bellied" bottles. A penguin toy from such a plastic bottle will turn out to be large and beautiful:

The color of the bottle is not important at all, as it will be completely covered in opaque paint.
2. Cut the bottles in half and leave the bases.

From the two halves of the bottles you get one cute little penguin.
3. Now glue the two halves together.

4. Now the fun begins. First we need to cover the resulting workpiece with white paint. It is most convenient to spray paint from a spray can, but you can use regular acrylic paints and a good old brush.

5. We begin to paint the toy. First we draw the border of the "coat", then we outline the eyes and beak. We draw bright clothes so that the penguins stand out in the snow.

6. Now you need to prepare a pompom for a hat. To do this, take two cardboard rings and put them together ...

And wrap with thread.

Then we cut the threads along the outer circumference. We put one part of the scissors into the gap formed by two cardboard circles, and cut the threads in a circle without touching the layer of threads along the inner circumference. We do not remove the cardboard!
Now we take a thread, insert it between two cardboard boxes and tighten it. Uncut threads along the inner circumference are intercepted and collected in one "sheaf".
Now we remove the cardboard and straighten the threads. It turns out such a funny pom-pom:

7. It remains only to glue the pom-pom to the painted hat, and the craft from the plastic bottle "pinvin" is ready!

We will create bright and original penguins from plastic bottles of any size. These wonderful penguins will be both a wonderful addition to the New Year holidays, and just a wonderful toy made by your own hands and the hands of your children.
Step 1. First we need a bottle. It is better to use bottles whose bottom expands (for example, for Coca-Cola). A penguin toy from such a plastic bottle will turn out to be large and beautiful. The color of the bottle is not important at all, as it will be completely covered in opaque paint.
Step 2. Cut the bottles in half and leave the bases. From the two halves of the bottles you get one cute penguin.
Step 3. Now glue the two halves together. We use universal glue "moment".
Step 4. Now we need to cover the resulting workpiece with white paint. It is most convenient to spray paint from a spray can, but you can use regular acrylic paints and a good old brush. After that, we let our workpiece dry.
Step 5. We begin to paint the toy: first we draw the border of the "coat", then we outline the eyes and beak. We draw bright clothes.
|
|
|
|
Step 6. Now you need to prepare a pompom for a hat. To do this, take two cardboard rings, put them together and wrap them with threads.
Then we cut the threads along the outer circumference. We put one part of the scissors into the gap formed by two cardboard circles, and cut the threads in a circle without touching the layer of threads along the inner circumference. We do not remove the cardboard!
Now we take a thread, insert it between two cardboard boxes and tighten it. Uncut threads along the inner circumference are intercepted and collected in one "sheaf".
After that, remove the cardboard and straighten the threads. It turns out such a funny pom-pom:
Step 7. We glue the pom-pom to the painted hat, and the craft from the plastic bottle "pinvin" is ready! You can also decorate penguins to your taste using: rhinestones, scarves, sparkles, etc.
|
|
|
|
Manufacturing crafts from plastic bottles became a popular activity. For example, birds from ordinary plastic bottles look great in the garden. You can make a heron or a stork, and perhaps a whole “bird theater”.
For one bird craft from ordinary plastic bottles, you will need one large bottle with a capacity of 5-10 liters, as well as bottoms from half-liter and one and a half liter bottles. Additional materials will be metal rods, fishing line and plastic bags.
In order for the bird from the bottles to turn white, it is not necessary to take opaque bottles. It is enough to paint them with acrylic paint or spray paint, from which it is convenient to paint crafts already in finished form.
How to make a bird from plastic bottles, a master class with a photo will tell you. Many people dream of making a peacock from plastic bottles using a master class, as shown in the photo.
Peacock made from empty plastic bottles

Master class with a visual photo:
you will need 2 five-liter bottles, brown and green bottles of various capacities and shapes, plastic tubes, polystyrene and strong wire;
bend the wire so that the back of the peacock is formed on the bend - this will be the top of the bottle;
We cut the five-liter bottle from the top and back. Slightly shift the cut strip and secure with wire. Thus, the torso is formed;
connect the torso and legs, giving the desired position to the bird;
fix the legs with wire in several places;
cut a two-liter dark bottle into 8 long feathers, and make 6 more short feathers from the bottom;
start screwing the feathers row by row;
cut off the smooth part of the milk bottles, which will serve as the top of the legs. Having rolled up a bag, screw them to the body;
cover the chest, a little side and stomach with feathers;
bend the mesh in the shape of a bottle. With the help of wire cutters, wings and a tail are made. Choose the length of the tail yourself;
cut out the middle part of the bottle and cut it into 5-7 centimeters. For each wing you should get 7 pieces;
screw to the grid, while shifting each next pen relative to the previous one;
the second row of the wing is made from 3-4 one and a half liter bottles of dark color. They must be cut into 6 feathers. Arrange the feathers in a semicircle;
lay out the next rows of the wing with feathers from half-liter bottles. One bottle makes 4 feathers. Approximately you will need 30 bottles. Lay all feathers closer to each other;
make a head out of foam. We use eyes for toys. Make a crest from a strip from a bottle. Pour glue into the hole in the head and insert the feathers;
strengthen the beak. Cut a triangle out of the bottle and bend it in the center and glue it on the beak;
for the neck - 2 five-liter bottles. Roll them into a bag, connect them together;
screw the feathers in a circle;
half-liter bottles will go to the paws;
fasten the last rows to the head with glue;
color the torso;
from the green plastic bottles tail feathers are made. Fold the middle part of the bottle lengthwise, give it the shape of a feather, making the top fringe. One bottle will go for 2 small and one large pen;
paint blanks with green paint. Begin to screw the feathers from below, placing them in a semicircle. Connect all parts of the body with screws or wire.
Now you have an idea how to make any bird from plastic bottles with your own hands. The master class should help you with this. With it, you can make such a romantic bird as a swan. In the form of a flowerpot, it will look great in the garden.
A swan made from a plastic bottle. Master Class:

you need five-liter bottles, thick wire or metal rod, metal mesh, putty, sandpaper and sand;
cut the bottle to get a roomy container. It is better to cut only one side and along;
prepare putty. Lay a five-centimeter layer on the polyethylene, on which place the bottle and press a little. Smooth the rest of the putty over the top of the bottle;
insert a rod, curved in the shape of a swan's neck, into the cap, which is screwed to the neck of the bottle;
press putty rollers into it. Wrap a bandage around each layer of the roller. The body should smoothly flow into the neck. Make the base of the neck thickened;
blind a swan head with a beak at the very end;
a metal mesh must be pressed into the putty on the sides. She must harden. Spread putty on the mesh on both sides;
make a tail from the corner of the grid;
after the swan from an ordinary plastic bottle is ready, the master class ends with the transfer of the bird to a dark place for 2 days before drying. After that, the swan is processed with plaster, and then with sandpaper. Apply primer before painting. It is better to paint with white paint-enamel. Fill the bottom with earth to plant flowers.
Owl from ordinary plastic bottles. The manufacturing process is shown in the photo:
Another option: one two-liter soda bottle, where there is a “waist” at the bottom of the bottle;
cut off with scissors the bottom of the bottle where the bend is. A similar bottom with “waves” will be the head of an owl with ears;
cut off the second part at the top from the lid;
connect both blanks together;
paint the resulting owl from empty plastic bottles with acrylic paints, as shown in the photo.
Penguin from a plastic bottle handmade, will be a fun craft.
You will need two Coca-Cola bottles, paint, a small piece of fabric, markers, a sharp stationery knife or scissors, all-purpose glue.
Do-it-yourself penguin from a simple plastic bottle:

a Coca-Cola bottle is suitable for crafts because it has a shape with a narrowed middle and an expansion at the bottom;
from two bottles of the same size we make 2 blanks. One bottle will be part of the first bottle from where the tapered part of the plastic bottle originates to the bottom. The other, shorter one is the lower part from the second bottle;
connect two workpieces by putting a small workpiece on a large one at the cut point;
fix the connection with glue;
paint the blank with a resistant white paint that is not afraid of water. For a high-quality coating, make several layers of paint;
with a marker, draw the contours of the penguin's breast and its muzzle;
paint over with black paint everything that is outside the outlined contour. With the exception of the upper part of the craft - hats;
paint the top, hat, in a bright color. Draw a pattern on it;
draw a beak and eyes with a thin brush or markers;
make a scarf out of a piece of cloth and tie it around the penguin's neck.
Flamingo from plastic bottles, made by hand:
at the first stage, it is necessary to collect the "plumage" of birds from the bottoms of the same size;
Pour sand into a pan and heat it up. By dipping the bottom into hot sand for 1-2 seconds, you will get an even cut. Align the sections of all the bottoms in a similar way;
to make flamingos from ordinary plastic bottles with your own hands, collect the bottoms on a fishing line, making two holes in each of them with a red-hot awl: one opposite the other at the very cut. Collect long garlands from the bottoms;
the large bottle will become the body of the bird;
insert a curved metal rod into the plastic cork of the bottle - this is the neck;
wrap the rod and the bottle-body with plastic bags, giving the shape of a bird's body;
at the end, put a large plastic bag on the body;
take garlands from the bottoms of plastic bottles and wrap them around the workpiece. Lay the threads tighter to each other;
eyes can be made from corks. Cut out the beak from plywood and paint;
make legs out of metal rods. The main thing is to pierce the bottom of the bottle. Paws for such crafts are not made. The rods are simply stuck into the ground. Such crafts can be easily transferred from one part of the garden to another.
PIGS FOR GIVING IDEAS AND SEVERAL PHOTOS OF MASTER CLASSES
I really liked this piglet, unfortunately I don’t know the author, photo from the Web. Only three photos, but everything is very clear.
A penguin made of plastic bottles will become a worthy part of your interior or garden decor. This is a charming and relevant element, especially in the winter season, it can be safely put under the Christmas tree. And the kids involved in the process of making a penguin will get a lot of positive emotions.
In this master class, the whole process of creating an original craft is described in detail!
To create a Penguin, you will need quite a bit:
- three plastic bottles of any size;
- acrylic and emulsion paint;
- scissors;
- kolinsky brush or synthetics;
- pompom;
- foam sponge;
- glue.
To create a blank, you need to carefully cut two bottles in half. To do this, you need only the bottom of the bottles.

From the third bottle, cut out, according to ready-made patterns, the wings and legs of the penguin.


The base of the parts is extended by about 1 cm.


Here's what should happen.

If one of the parts is hard to fit on the other, you need to make a small incision.


The wings are inserted overlapping the top of the bottle and the bottom. To fix the legs, two small holes are cut in the bottom, into which the legs are then inserted.


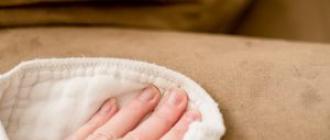
We cover the entire area of the product with white water-based paint.

It is necessary to prime the craft in two layers. Due to the density and density of the paint, you get such a texture.

While the soil dries, you can cut a scarf from a plastic bottle. Its ends are cut into small strips.

After the soil has dried, with a marker on the workpiece, you need to sketch the contour of the eyes, beak and breast.


And after that, you should start color painting ...
First, the penguin must be painted in primary colors.


Each layer should dry well, if non-painting and bald spots appear, you can cover the craft several times.
The contours can be drawn with an ordinary black marker, on top of the already dried acrylic paint.


As a result, the craft takes on a complete look, it remains only to attach the pompom.
If you wish, you can make a pompom yourself or take a ready-made one (as in this case).
With the help of glue, the pompom is attached to the hat of our penguin.
And the product has acquired a final, complete look. It turned out such a wonderful little penguin in a hat!


The final look of the craft.
The process of making crafts with your own hands is absolutely not laborious, and also does not take much time. Boldly experimenting, you can get a very original thing that will decorate or complement the interior, bringing a special atmosphere and comfort to it!
As for the environment around us outside the house, then for it we can make a very original birdhouse from a plastic bottle, which will be of great benefit to birds that do not fly away to warm lands for the winter!
It is also important that using bottles that have become unnecessary for crafts, you can make a feasible contribution to the preservation of the environment.
To make a penguin, you will need two plastic bottles with a capacity of 1.5 or 2 liters, cleaned of labels and traces of glue.
The best crafts are made from those bottles that have a slight narrowing in the middle - this form gives the greatest realism to the penguin figurine.
The bottles are cut in half, leaving their lower parts for work. Both parts are connected to each other with glue for additional fixation.
To make the penguin figurine as stable as possible, you can attach a piece of plasticine to the bottom of one blank, pour small pebbles, sand, put a few pine cones.
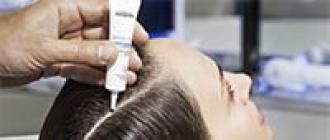
The workpiece is covered with a layer of primer or, in its absence, a base layer of white paint. It is most convenient to use aerosol paints, because. covering with a brush takes a little longer.
After the base layer has dried, with a marker or a thin brush, the contours of the main details are applied - the belly and cap of the penguin.

The body of the penguin is covered with black paint, after it dries, they begin to draw the rest: the tummy is painted with bright white paint - acrylic, gouache or with a metallic sheen.

The hat and scarf are painted with any bright paint, which gives the craft a festive look. To make the hat look most impressive, you can attach a small pompom to it.

The eyes and beak of the penguin are drawn with a thin brush; if desired, the finished craft can be varnished. If you have unnecessary scraps at hand, then you can not draw a scarf, but make it from fabric.

We continue to contribute to the preservation of the environment by using obsolete plastic bottles as craft material. This time we offer you the idea of making an adorable penguin with your own hands to create a beautiful winter decoration at home, in the garden or in the country house.
Below are two options for implementing the idea. You can choose any of them or both at once, depending on your desire. There are children - they will be great helpers in the process of making products from plastic bottles, as this is a very simple job that does not require special skills and abilities (especially option 2).
You are ready? - Then go ahead in the photo master class!
How to make a penguin from plastic bottles - option 1
Necessary materials:
- 2 empty bottles of water or drinks with a volume of 2 liters;
- Paints;
- Paint brush;
- Braid;
- Pompon;
- Hot glue gun.
Instruction with photo:
1. Wash bottles thoroughly and remove all labels.
2. Cut both bottles in half and leave the bottom pieces.
3. To make the body, connect the bottoms of the bottles by inserting one inside the second, as shown in the photo. The bases of the bottles (one at the top, the second at the bottom) will play the role of the head and legs of the future penguin.
4. At this stage, you can add glue to fix it, but our bottles fit together quite tightly and we decided to do without it.
5. Apply a base coat to the body of the penguin (we used white spray paint as a base coat on the entire torso). Once the base coat is dry, paint the body with black paint by painting the "widow's toe" on the penguin's forehead.
Make sure the lines of the widow's toe are parallel to the bottom two ribs of the base of the bottle, which will be used as legs. Choose a color for the penguin hat and paint the top base of the bottle as shown in the photo. Add facial features - eyes and beak.
6. Leave the penguin to dry completely.
7. Tie a piece of ribbon around the penguin's body in the form of a scarf and glue the pompom to the top of the hat with a hot glue gun. Baby is ready!
Video: how to make a penguin from a plastic bottle with your own hands
How to make a penguin from plastic bottles - option 2
Necessary materials:
- Adhesive tape/Scotch tape;
- colored paper;
- Plastic bottle;
- Scissors;
- PVA glue.
Instruction with photo:
1. To make the penguin's body, wrap black paper around an unlabeled plastic bottle. Cut out an oval from white paper and glue it to the front of the bottle as a belly.
2. To make a scarf, cut a long strip of pink paper and glue it around the upper torso. Then cut two more long strips, make cuts at their ends in the form of a fringe and glue them as the ends of the scarf.
3. Cut out two wings from black paper and glue them on the back of the penguin's body.
4. To make the head, cut out a circle from black paper and a smaller circle from white paper. Cut out eyes from black paper, a beak from orange paper and glue them on a white circle. Glue the white circle onto the black circle in the center.
5. Cut out a hat from pink paper and glue it on the penguin's head. Glue the penguin's head to the front of the torso above the scarf line.
6. Cut out two paws from orange paper and glue them to the base of the bottle, as shown in the photo.
The work is done!
So, you have two funny penguins. Using additional materials and your own imagination, you can create a beautiful winter composition on the windowsill, under the Christmas tree, on the site near the house or in some other place that will delight the eye and cheer up the whole family on long winter evenings.