Hello dear readers and art lovers! Surely you know a lot about good gift wrapping with your own hands? It is she who creates the first impression.
We have already considered with you earlier the manufacture of such packages as, and whole. But sometimes not just a box looks much more effective, but Wicker basket with a gift inside.
And, what is very important, for the material for manufacturing DIY baskets it is not necessary to go to the country or to the forest. Everything is at hand, because our baskets are made of ... paper. Yes, yes, either from newspapers or magazine pages. Don't believe?
In this master class, I will show you how to make a paper basket with your own hands. I think you will need it very soon. After all, it's Easter. Put krashenki in such an original package, and they will definitely become the most important gift for your relatives. Also, it's very stylish! Honestly!
So, to make a paper basket, we need:
- office paper (or newspapers);
- liquid glue (PVA or simple stationery for paper);
- paints (preferably acrylic);
- shape (e.g. glass jar).
This is such minimalism!
Important! Before starting to make a basket, I recommend reading the article, which contains valuable experience of mistakes and developments.
How to make a paper basket:
Part 1. We prepare a paper "vine" for weaving
Cut an A4 sheet lengthwise into 2 equal parts. It is better to cut several sheets at once. We need a lot of paper.
Next, we take a skewer for either a knitting needle and begin to wind our workpiece onto it, starting from the corner. You get tubes. Please note: you need to twist at an angle of 45 ° and as tightly as possible. In this case, the tube will come out even and will not wrinkle much, but at the same time it will be quite flexible.
At the end of the winding, we fix the corner with glue. Even if the first time you don’t succeed in winding a neat tube, you shouldn’t worry, it didn’t work out for me right away either. By the end of the preparatory stage, the tubes will get better and better.
These are the tubes for weaving a basket with our own hands we will need. Only a small part of the blanks is shown here. In fact, we need them decently.

Now we need to lengthen some tubes. Please note that each blank is slightly wider on one side than on the other. So, glue the narrow tip with glue and insert it into the wider end of the other tube. It turns out an elongated stick.

We need 9 such sticks to start.
When the impromptu "vine" is ready, I suggest flattening it a little. So weaving will turn out more even.
Part 2. Weave the bottom of the paper basket
I offer the simplest version of weaving the bottom of the basket with my own hands (however, such weaving is more suitable for small baskets). So, we put 4 large tubes on the table parallel to each other. Then we take another long blank and weave it perpendicularly, alternating position under the tubes / over the tubes. In the same way, we insert 3 more tubes in a checkerboard pattern. It turns out such a wicker square. Try to weave as tightly as possible, then the bottom of the basket will turn out beautiful and even.

Now, in fact, let's start weaving (the warm-up is over :)). We weave the remaining long tube on one side. Pay attention to the photo, on the right I have not 4, but 5 tubes. Then we bend it at an angle of 90 degrees and weave in a circle, all the while alternating the position under / over.
We make several such turns, gradually adding length in the above way. You will see how your workpiece will be rounded. The size of our braided circle must strictly correspond to the size of our shape, according to which we will braid further. paper basket. In addition, try to equalize the distances between the rays by this point.
As soon as we have reached this point, consider that the bottom of the basket is ready with your own hands!
Part 3. Building the walls!
To make it more convenient, we bend all the rays of the future wicker basket up. If the container is supposed to be high, then at this stage it is necessary to build up the tubes. I did not build up, because. basket is low.
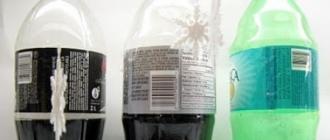
We set the form (I have a 1.5 liter jar in which I roll up). And in order to achieve beautiful verticality, we will fix the rays with an elastic band at the top of the jar and try to set them with an equal distance between them.

Here begins the most difficult stage. The fact is that the tube with which we braid the basket will have to be pushed through once under the rays, and they are fixed with an elastic band. This is not very convenient, so you have to work with a small length, constantly increasing it as needed. In addition, right now you need to try to weave as tightly and accurately as possible, which will require a little more effort, because the vertical sticks are not yet rigidly fixed (just with an elastic band).
But all these inconveniences can be stopped after 2-3 rows. Then the gum will no longer be needed. However, constantly make sure that the weave is obtained without gaps, tightening where necessary.

Having reached the desired height of the walls of the wicker paper basket, let's immediately think about the handle. Let's pass our weaving tube between the top and penultimate rows, sticking it out from the inside. It will be between two adjacent rays. We won't touch them for now. We also note immediately 2 more rays opposite these. We also leave them as they are.
And everything else is a little cut and bent. We coat each ponytail with glue and, using the same skewer, plug it behind the nearest lower row (Fig. 1 and 2).

This is what a wicker basket looks like after these manipulations (Fig. 3).
Part 4. Paper basket handle
Everything is simple here. The tube with which we braided our entire paper basket is now inside the basket. We circle it with one of the protruding rays and again push it inside. Now do the same with the other beam. And so on (up to about 2/3 of the length of the future handle). If you want a long basket handle, then you need to grow those two rays.

So we got to the opposite rays. I propose to glue them together, we get such a bridge. We cut off the excess length and braid to the bottom of the handle.

From below, we pass the tube between the last two rows and make another turn on the other side. Lubricate the tip with glue and fix it inside the rows with a skewer.

This is what a hand-made, but not yet painted, paper basket looks like.
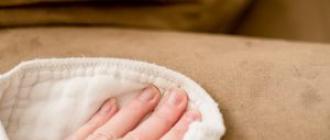
The case for small: painting remained. It's great that these wicker baskets are made of white paper, which gives great possibilities in choosing colors. I recommend using acrylic paint, because. it does not soak the paper and does not deform it after drying, as, for example, watercolor. In addition, dried acrylic paint is already strong enough in itself and does not stain at all.

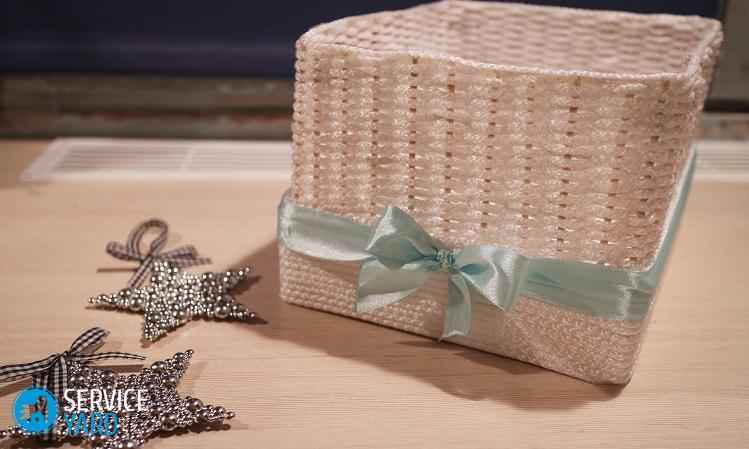
Let our paper baskets dry. If you want to give them a special look, you can also varnish them. Here everything is in your hands. And here is my result!

Such baskets with their own hands can be made by anyone who wants to. It will be very cool if my master class will help you decide on this step, because it is always easier with instructions.
By the way, I have two workshops on making paper baskets, where weaving is not required. Here are links to them:
Basket made of paper strips. Weaving. Master ClassIf you don’t know what to do with yourself on the weekend, I suggest you weave a little thing in the household - a basket. The theme is from the paper weaving series, but you don't have to twist the tubes here, the basket is woven from stripes. For work, you can use rice, wrapping, packaging, office paper, newspapers or magazines. In this version, thin wrapping paper was used, the sheets were 75 by 30 cm in size. The author of the work and the master class Blanka PE
A woven basket can be painted with any wood paint, gouache, stain. After staining and varnishing, it will hold its shape, be strong, like wood, and waterproof. It will be easy to put wet fruits in it. Such a basket will fit in and decorate any interior. By the way, about the interior) If you are planning to start repairing your home, I suggest that you look at the pages of the site of the company of the city of Yaroslavl "Axioma" 918747.ru/natyazhnye_potolki/. The company has its own production of a modern design element - stretch ceilings. On the site you can view a gallery of the company's work, as well as order the installation and installation of stretch ceilings made from the best European materials.
So, for work, we take any paper that is at hand. We also need: scissors, paper glue, clothespins and tweezers for easy weaving, wood paint and varnish, braiding form

We cut the paper into strips, fold them 4 times. The width of the strip can be taken at 4 cm, centimeter strips will be obtained, you can make them wider

Fold so that the edges of the paper are inside the fold

We take canton. We begin to weave a regular checkerboard, fixing the strips with clothespins

We attach all the strips to the cardboard

This is what the bent ends of the strips look like on the back of the cardboard


Now we need a form for braiding - a box


We bend the braid


We hide the excess ends of the strips with tweezers.

And cut


Bend vertical strips and glue
Wicker things have been popular at all times. Only before they used birch bark, vine, willow twigs, and now they are being replaced with an ordinary newspaper, magazine and office sheets. Such products are covered with stain, varnish, due to which they create an imitation of the structure of a tree.
This is the popular Master class for beginners will be devoted to the basics of this needlework, since the information on it is scattered in pieces from various sources, and all the available lessons on weaving crafts are designed for people with basic knowledge.
Material
For weaving, you will need paper, knitting needles, paint, stain, varnish, cardboard, glue. Newspapers, magazines, office and fax paper are suitable for work. Softer tubes are obtained from a newspaper, and thinner, more elastic tubes are obtained from magazines and office paper.
Please note: four tubes should be obtained from one newspaper spread (the width of the segment is no more than 7-12 centimeters). From office paper, cut narrow strips 2-3 centimeters wide.
Experiment with different types of material, then get extraordinary paper weaving. You can create a wide variety of crafts using this technique - from trays and panels to animal figurines and dishes.
Masters use knitting needles of different thicknesses. The selection depends on the craft: for example, a newspaper needs a No. 2-3 knitting needle, and a stocking needle for office paper. For the base of the craft, twist the thick tubes, and for the braid - soft ones.
Choose paint, stain on a water-based basis (on alcohol, the product dries quickly, but makes the tube brittle). Dilute the paint with PVA glue (2:1 or 3:1). They paint either the product after work, or the workpiece before the start of the creative process. But the finished craft is always smeared with glue, left to dry. Only at the last stage it is varnished. Cardboard is used to create a finished bottom or container of the desired shape.
Paper weaving: a master class for beginners
How tubes are made:
The tubes should not be soft or hard; ideally, a “medium” paper weave is obtained. For beginners, a bunch of video tutorials on twisting have been created, but without practice they are useless. For example, for blinds and panels, craftsmen specially twist hard sticks, for decorative miniature items they prepare thin tubes, where the width of the strip can be less than the traditional seven centimeters. You need to experiment to find your own thickness of the tubes.
Please note that when cutting with a knife, notches are formed that interfere with proper twisting. Therefore, before work, do research work: try to cut two sheets of newspaper into transverse and longitudinal strips, determining how fewer notches are obtained. It is from a segment with smaller notches that the tube rolls off without problems.
Paper weaving: step by step instructions for twisting and painting
When twisting the sticks, one end should be wider, and the other narrower. So when weaving crafts due to the insertion, an extension occurs, that is, a narrow corner is inserted into a wide one. If the ends are the same, then one edge is flattened, compressed and inserted.
Many masters do without glue when building, they simply insert a stick three centimeters deep into another. Other pros drop a drop of glue into a tube with a wide end, and advance it three centimeters with a narrow stick.
There is also a secret how to make the twisting faster and the weaving soft. Before work, newspaper tubes are laid out in a row and walked over them with a rolling pin. It turns out that each master has “his own” paper weaving.

Master class for beginners in painting tubes
- First way. Paint the sheets before work, then dry, cut into strips and twist into tubes.
- The second way. Twist the sticks, then paint each one individually with a brush. Suitable for products if you need an unusual pattern.
- The third way. You make crafts, then decorate by weaving or randomly with a brush.
Methods of mass painting

For paint, you can use a water-based emulsion, pigments, for eggs. If you get an unsuccessful color, still continue weaving from paper. A basket, for example, can have any color, just complicate the weaving or resort to decoupage.
Tube secrets
Please note that the color becomes lighter after drying. By combining with other sticks, you create the desired pattern or draw the finished product with the desired shade. Drying is not necessary until completely dry. Wrap slightly damp sticks in a bag so that both ends are outside. In winter, they can be stored in the cold.
The sticks must be flexible in work, and after painting they become hard and brittle. Ideally, immediately after painting the tubes, paper weaving should begin. A basket, boxes, dishes can be obtained from dry colored tubes if you spray the middle of the sticks with ordinary water using a sprayer from all sides before work.

Wrap them in a wet cloth (ends outside) or put in a bag. You prepare a large number of tubes at once, so that in the process of work you are not distracted by twisting.
When weaving, an even and odd number of tubes is taken. It is in the direction where there is an odd number of sticks that work begins. The “odd” tube braids all the others. As soon as its length ends, build up a new stick.
Types of weaving
We have finished the material blanks, now we will consider paper weaving. A master class for beginners on his technique is given below.
- Simple plain weave. With a braiding tube, like a snake, go around each stick of the base. That is, it either covers the base, or hides behind it. If you need to return, then weaving goes the same way, but in the opposite direction.
- Simple weaving in rows. The pattern changes after several rows. That is, take one stick, go through simple weaving. The next tube lays down in the same way as the first. So continue the drawing several times. Then you shift the pattern, that is, where the base was braided, it remains free, and the next one is braided the same number of times as in the first pattern.
- Simple diagonal weave. Each tube begins with a new base stick diagonally. It turns out an oblique (oblique) pattern.
- Simple diagonal weaving in rows. Just as in a horizontal pattern, weave with several sticks, and shift the new circle along the pattern.
Varieties of weaving
We continue to consider paper weaving (a master class on creating patterns):

Technique and secrets of weaving
To keep any pattern, it is braided with a rope or a pigtail. Let us consider in more detail the “protective” paper weaving (we will describe it step by step using the example of a basket).

Please note that the weaving of the tubes begins with thick ends from left to right. To get a given shape, the racks are pinched to the desired object (vase, bucket, box, etc.). The finished product is abundantly lubricated with PVA glue (with or without paint), “put on” on the object of the desired shape, and dried. Then, when painting and varnishing, the product from the tubes will be beautiful and durable.
Basket making
For beginners, it is better to start with something simple (for example, blinds, frames, panels) to train your hand in twisting the tubes and simply interweaving them. Then you can move on to complex paper weaving (horseshoe, heart, box, bell). Consider a master class on weaving a simple basket without a lid and a handle.
To save the labor of weaving baskets, use a cardboard bottom. To do this, take an object of the desired shape, circle the bottom on thick cardboard. Cut out two pieces. Decorate them immediately (paste with wallpaper, paint or apply decoupage).
Attach to the bottom half along the edge. Now glue newspaper tubes on it. The distance between them should not be more than 2-3 centimeters. This is the basic rule of such needlework (meaning paper weaving).
Pen holder, photo frame, hat - any craft should have a distance between the racks of no more than three centimeters. The fact is that a larger gap between them leads to friability and fragility of the product.
Continuation of basket weaving
Next, apply PVA glue to the bottom with tubes, cover with a second bottom, put a load on top and leave it overnight. Now go through two rows with a “string”, a simple interlacing of racks. After that, put the form on the bottom on which you will weave, with a load (the load is needed to fix the bottom when weaving). If you immediately start weaving the walls from the cardboard bottom, then you will get holes in the basket that will need to be decorated.
Raise the tubes up, continue working until you reach the desired height. Next, braid up or separately weave a pigtail, gluing it to the base. By the same principle, paper boxes with a lid are weaved from paper.
There is another way to weave a rectangular bottom using ribbons and newspaper tubes. This look is reminiscent of working with a paper strip rug. Only in this case, take not one tube, but two or three for one unit. For example, below are four groups of sticks. Then put three sticks across them on them.

Lay four groups of tubes on top so that their ends are between the bottom ones. Now you braid all the rows with a ribbon or a soft stick. Then lay the transverse group of sticks again, braiding them with tape. Using colored tubes, you can get an original pattern.
The bottom in this case turns out to be voluminous, as if double. Then you lift all the joints, braid them with a “rope”, smoothly moving to the walls of the product. For trays, this is the optimal paper weave. A step-by-step photo on weaving a square basket clearly shows the essence of the work. Prepare tubes and create.
If you have never worked with newspaper tubes, start with simple views. For example, blinds. To do this, simply twist the thick sticks along the length of one half of the window. Tie a double knot on both sides of each stick, retreating from the edges by 3-4 centimeters. In the process of work, you coat the “seams” with glue.
From above, fasten along the ring for the curtains (blinds will be attached to them) and a loop where you can put a twisted roll if necessary. Paint the finished product, varnish it. Now you can try simple weaving on small souvenirs and move on to baskets.
There are a lot of different paper crafts. It is not surprising, because this material is very convenient - you can make anything from it: from applications to things you need in everyday life. In this article, you will learn how to make a paper basket in several ways. Such a thing is useful in that you can store some useful items in it, plus, such baskets perfectly complement any interior.
Newspaper basket
The product that will turn out in the end will have an unusual beauty, and even a novice needlewoman will be able to cope with its weaving.
Work materials
In order to make such an unusual decor element, you need to stock up on the following materials:
- Old newspapers (you can also use magazines).
- Long knitting needle.
- Glue - it is better to take PVA.
- Linen gum.
- Sharp scissors.
- Clips for drying clothes.
- Brushes for gluing and painting the basket.
- Office knife.
- The base to be used for weaving.
- Thick cardboard.
- A small load - it is needed in order to give the product a shape.
- Acrylic or gouache.
- Lacquer for decor.
- Decorative items, such as artificial flowers, beads, beads, decoupage napkins, and more.

Algorithm for the production of tubes
In order to make a paper basket with your own hands, you need to make as many paper tubes as possible - this is necessary in order not to break away from this business during the entire work procedure.
In order to make paper tubes, you need to follow this algorithm:
- Disassemble the paper into double sheets, line them into strips, the width of which will be 10 cm.
Important! It is desirable that the length of the strips be the same, so it is better to use newspapers or magazines of the same type.
- Cut the paper along the drawn lines.
- Take the prepared knitting needle, attach it to the corner of the strip at an angle of 10 degrees.
- Start winding the strip on the knitting needle until it is all twisted into a tube.
Important! Keep in mind that one end of the paper tube should be smaller in diameter than the other end - this will help build up the tubes later.
- Lubricate one end of the paper with PVA glue and glue it so that the tube does not unwind.
So, the tubes are made.
Important! If you have a desire, you can immediately paint them in the desired color with gouache or acrylic paint, if not, you can do this when the basket is completely ready, or not paint it at all.
There are two ways to achieve the desired result.
Method 1 for making a basket
This method is the easiest. To make a paper basket, you must perform the following procedure:
- Cut out two cardboard bottoms, which will be in the shape of a circle or an oval.
- Flatten a 20 mm paper tube from the edge, grease this piece with adhesive, glue it to the bottom.
- Carry out the same procedure with other tubes from newspapers, evenly placing them around the perimeter of the bottom. The approximate distance between them is 2 cm.
- Lubricate the second bottom with glue, glue it with the first so that the glued sections of the tubes are between these two parts.
- Put the load on and let the base dry completely.
- Bend all the paper rays so that they look up.
- From the inside, glue the currently working tube to the bottom, and then start weaving the walls. In this case, you need to place it either in front of the base tube, or behind it.
- Weave the basket in this way until you reach the desired length.
- When the product is ready, it can be decorated with decorative elements as desired.
Method 2 for making a basket
This method will differ in its complexity. If you want to follow it exactly, then it is better not to paint the paper tubes in advance.
In order to make a paper basket with your own hands, you must follow the proposed algorithm:
- Arm yourself with a bottle or jar, circle it at the base on a piece of thick cardboard.
- Cut out two outlined circles.
- Now you need to make a frame. To do this, flatten one edge of the newspaper tube by 2-3 centimeters.
- Apply glue to one base circle.
- Glue paper tubes to this base with flattened ends - they must be placed at an equal distance, which will be approximately 2 cm.
Important! In order for the parts to stick better, it is recommended to use a press or a glue gun.
- Lubricate the second circle with glue and glue it on the second, thereby hiding the attachment points of the vertical tubes.
- Allow the workpiece to dry - it will take several hours.
- Take a tube with a flattened edge, glue it to the base. Lead it by the right vertical vine, which is closer so that it wraps around the frame from the outside. After that, it must be brought in the other direction so that the tube wraps around the vertical vine from the inside.
- Continue to follow the algorithm until the first row is woven. When the paper tube runs out, insert a second one into it.
- Further, in order to make the do-it-yourself paper basket look neater, you need to insert a jar, vase or bottle into the resulting blank.
Important! It is necessary that the bottom of the container coincides with the cardboard bottom of the future product.
- Weave the height you desire.
- Now the tip of the last tube must be cut off and fixed with good glue approximately in the middle of the craft.
- Cut off the first vine, which plays the role of a frame, and glue the rest to the inside of the product.
- Do the same with the rest of the vines. The basket is woven.
- If desired, the basket can be woven and glued with a decorative handle.
- Apply the desired paint to the product. It is better to do it in two layers. It is better to cover the base of the basket with three layers of paint.
The basket is ready! Subsequently, it can be used as a vase for dried flowers or as a box for the necessary little things.
Master class for children
In order to weave a basket of paper or cardboard, you will need the following materials:
- Colored paper in two colors or cardboard.
- Scissors.
To make such an interesting basket, you need to follow these instructions:
- Prepare strips. To do this, cut the paper into strips 1-2 cm thick.
Important! If the paper is ordinary, thin, it is better to fold the strips in half, if it is cardboard, then it is better not to fold. For this reason, it is better to cut strips of plain paper twice as long as you need for work.
There are many modern methods aimed at developing various skills in children. We offer a classic method in which the child will learn to use adult objects together with you: scissors, paper, rulers and pencils. Let's try to make a paper basket today.
We have specially prepared several instructions for you, including one video instruction.(at the very end of the post). As they say, instructions for every taste)
Instruction number 1:
The simplest basket that even small children can make. It is made from a square sheet of cardboard or paper. To make the basket beautiful, you can pick up cardboard with a pattern, or stick the pattern yourself.
1. We need to do the following: draw it into 9 equal squares (it should turn out 3x3 squares), in general, as shown in the figure:

2. Make cuts so that you can fold the structure:

3. Now you need to bend the workpiece so that the opposite edges are parallel to each other, and the remaining two are equally inclined:
 4. The squares in the middle should fix the basket and hold the entire structure, for this, take glue and glue them together:
 5. It remains to cut out the hair, which will serve as a handle for our basket, and then paste it. So, the basket is ready! Delov for 5 minutes))

Instruction number 2, wicker basket:
Everything here is somewhat more complicated than in the origami technique and in the simple basket technique. To do longer, but more interesting, and the result will be much more beautiful. This basket is made from long, straight pieces of paper. Take two large multi-colored sheets of cardboard (flexible and dense) and cut them into many pieces 30-40 cm long and 1.2-2 cm wide. Once prepared, you can start weaving. It is better to make the first basket from two multi-colored sheets in order to see the result of weaving - this will simplify the task. Start interlacing the strips so as to get this checkerboard pattern:
 2. Weave the bottom until its dimensions suit you. Approximately it should get a square with sides of 10-20 cm. Then it will be possible to start weaving the sides: it is necessary to bend the strips and fix the folds with glue and paper clips, and remove the paper clips only when the glue sets:

3. Weave the sides in the same way until you are satisfied with the height of the basket, while there should still be 3 cm left to bend and seal. If you want a deeper basket, then you need to prepare longer strips:

4. In principle, the basket is almost ready. It remains to bend the ends of the paper strips and glue them. And then glue the handle to the basket.

Instruction number 3, origami basket:
You will need a square piece of paper, take an A4 sheet and cut off enough of it to make a square:
You can make up a task with your child: let your favorite doll come to visit with this basket and take the gifts; Or make a flower basket together. Draw it first, think about its color and shape, think about how you can decorate it. Give your child space for imagination!
Help us develop the site, tell your friends about it by clicking the button :)