Perhaps the manufacture of such flowers is familiar to many. I like this flower because its petals can be cut out even from the smallest pieces.
Thus, we will get rid of the remnants of cutting larger things and create an independent decoration or an additional accessory to that very thing.
You will need:
- soft leather of medium thickness 04-0.8 mm;
- a base pin for a brooch 3-4 cm wide;
- blue stamens for flowers;
- PVA glue.
1. From the pieces of leather, first select and set aside the largest for gluing and whisks. From the rest of the scraps, cut out 8 petals of 5 sizes (A-D). First, I recommend starting cutting with large petals (size D). Small petals are then easier to squeeze into the remaining space between large petals.
Petal templates and rims for the center are given in actual size.
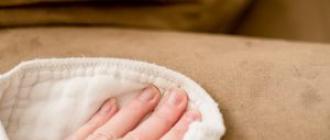
2-3. Now the leather petals need to be treated with a solution of PVA glue to give them rigidity and a more natural look.
To prepare the solution, the adhesive is recommended to be diluted with water in a ratio of 1:2 or 1:3. I do it “by eye”: when the bottle of glue runs out, I just pour some water in there and shake it. It is necessary to obtain a translucent solution, which, when smeared on the skin, does not leave white marks on it. This method is convenient because you do not need to spend glue every time when preparing a certain portion - the solution lasts for a long time and it does not deteriorate.
The degree of processing depends on the type of leather: if the front side has a glossy finish, then the petals can be soaked in a solution, and then put on a rag upside down, allowing excess moisture to drain.
4.
On more delicate types of leather, stains remain after drying, so you need to lubricate the parts with a solution only from the wrong side. I like to do it with my finger, not with a brush - this way I get a better feel for the degree of wetting. After that, I immediately wipe the surface of the table with a cloth so that moisture does not get on the front side of the part.
5-6. Having greased the petal, immediately fold it in half and twist it.
7-10. Leave the twisted blanks in this position for a while (about 10-20 minutes - this depends on the type and thickness of the skin, the degree of wetting), and then unwind. At the same time, the petals were already deformed, acquired bends, the sharp contours of the cuts were worn out. For a more natural look, place each petal on a smooth surface and use your fingers to fold it lengthwise into an accordion. Leave in this position until completely dry.
11. The resulting petals must be glued to a rigid base - a cardboard circle with a diameter of 4 cm (I like to use round cardboard game pieces).
12-13. First glue the petals of the 1st row.
14-15. At the same level, glue the petals of the 2nd row, placing them in a checkerboard pattern. Glue the petals of the next rows, slightly shifting their base to the middle of the flower, while they should rise slightly.
16. Also treat the corolla petals with a PVA solution, twist the ends in your fingers and roll up the bud. After drying, glue one beaters into each other in ascending order of size.
17. Tie a bunch of stamens in half with a thin wire and straighten in a circle (I previously painted the stems with a permanent marker). Drop glue into the middle of the flower and glue the stamens there, pressing their center with a tool for a while for better fixation.
18-19. Now again drop the glue into the middle of the flower and paste the bud there, press it with your fingers, shape it.
20-22. It remains to make a clasp: cut out a 1 cm larger diameter sticker from leather than a cardboard circle (5 cm). I used the lid baby food and cut out with curly scissors.
23-25. Now mark a place for the fastener, punch holes for it (on the left - 5 mm, on the right - 3 mm) and insert a pin.
26-27. Lubricate the gluing with PVA glue - first dotted, and then stretch the glue from the center to the edges with an awl, smearing them well.
28-30. Glue the sticker with a pin in the appropriate place, closing the cardboard circle. Ready! A day later, you can wear or give!
Options:
31. Petals can be cut from several skin tones.

I have MK for you. It's not a complicated flower at all. Does not require special skills and tools.
The master class turned out to be such a double one, one for a flower, the second for a close-fitting rim with velvet, you never know how to do it.
So, we will need:
Leather in two colors (in the photo I have three colors, but in the process I changed and used two). I took purple skin for the flower and dark gray for the leaves, but in the process I replaced this gray with black))
I use clothing leather, its thickness is about 1-2 mm. The thinner the skin, the more pliable it is during formation, the easier it stretches, the smaller the folds are.
Beads, beads, stones - filling the core of the flower
Threads and needle. Threads to match the velvet ribbon and skin tone.
- bezel-blank. I have a metal 5mm wide. In my opinion, this is the most reliable bezel that can only be. It will not break))) Its minus is that it has no teeth. Not everyone likes it.
Velvet ribbon. I have a stretch tape. You can take it easy. It so happened that it is more comfortable for me to work with a stretching tape. I took the black one, because black color universal, suitable for a flower of any color, any clothes and any hair. Yes, I love black so passionately. I would also make the flower black, but then it would be difficult to photograph, well, I also love purple, I love it.
Clay Moment Crystal Gel. The key word here is moment. I use exactly this, tk. it is not liquid and this does not allow it to flow to the other side of the fabric (if not immediately molded, of course), it is transparent - it does not give yellow spots. Well, actually I got used to it.
PVA glue. In the picture, stationery for clarity. And so I use construction, it is thicker.
Glue brush
- glass for dilution of glue
- water for dilution of glue
- scissors
- a pen or pencil drawing on the skin.

We apply the contours of the pattern to the skin. I do not give a pattern separately, because. in the next photo it is easy to trace it or draw it yourself in the right size. Three crowns of different sizes with five petals. The first (smallest) whisk - 1 pc, the second whisk - 2 pcs, the third - 2 pcs.
I don't trace the patterns completely, I put "ticks" in the places where the petals converge. This allows you to vary the shape of the petal, make the edge straight or wavy, and, importantly, you do not need to follow the cutting of the stroke, and the stroke (pen or pencil) must be cut MANDATORY.

Marked, cut out. Cut the petals towards the center.

I mix glue with water by eye in a ratio of about 1: 1. This is my thick carpentry PVA. If I used stationery PVA, I suspect that I would not dilute it at all, there is already enough water in it.

With a brush, I apply the solution to the wrong side of the leather blanks.
I apply with a brush, it's more convenient for me. Someone dips the entire workpiece into the solution.

We distribute the glue evenly, let it soak.

Do not rush to lubricate all the workpieces. While you spread them and stretch them first, some may already dry out ..

When the adhesive solution has already been absorbed, but the skin is still wet, we take the workpiece and begin to stretch the petals.
We take ONE petal by the edge with the thumbs and forefingers of both hands and pull to the sides or with one hand we pull towards ourselves, with the other away from ourselves, we stretch the edge. The movement is as if you want to break the petal. This is where you control the power. The skin is different, one is strong, the other is easily torn.
We stretch all the petals in this way.

I notice that in different directions the skin stretches differently. Do not be surprised that some petals stretch well in width, others in length, and others do not stretch at all.
Wet skin, the material is very pliable.. Pulled the petal too much, pull in the opposite direction, it will come back.
If you feel that the skin does not stretch, it has dried out or was initially little nourished, moisten it with the solution again.


Do not dry the workpiece in this state! Then you are tortured to tear apart.
Wait a bit, let it dry slightly and while still damp CAREFULLY unfold. Lay to dry skin (damp side) up.
The front side looks like this.

We do the same with the leaves. For the leaves, by the way, no patterns are needed at all, we cut them out by eye. 
While our petal leaves are drying, we make a rim. Lubricate the blank for the rim with a thin layer of glue. Not all, five centimeters.
Making a brooch "Snow flower" from waste material - scraps genuine leather. Master class with step by step photos.
Serenkova Elvira Fyaritovna - teacher of additional education MBOU DOD Center for Children's and Youth Tourism and Excursions (young tourists) in Lukhovitsy, Moscow Region.Target: Making a brooch "Snow flower" from scraps of genuine leather.
Tasks:
Continue to acquaint pupils with technologies, techniques, features of working with natural leather;
Develop an eye fine motor skills hands;
Develop creativity, imagination, fantasy, ingenuity;
To cultivate artistic taste, aesthetic and compositional feelings;
Cultivate accuracy, patience, perseverance in work;
Cultivate the habit of bringing the started business to its logical conclusion;
Activate creativity.
Description: the master class is intended for children of middle and older school age, teachers of additional education, educators and just creative people who love to create something extraordinary with their own hands.
Level of difficulty: Average. Product manufacturing time 3-4 hours.
Purpose: interior decoration (panel element, tieback for curtains), a gift, a decorative Christmas tree decoration, a decoration for a personal wardrobe (on Evening Dress, stole, headdress, sweater, jacket), hair decoration as a hairpin, headband (bride, girl), etc.
A bit from the history of the development of leather craft.
Leatherworking is one of the oldest crafts on earth. Leather is a material of biological origin, and over time, products made from it disappear without a trace, leaving a memory, legend, display in a drawing or literary description about themselves. All the peoples inhabiting our Earth, one way or another, were engaged in leather production. Indeed, often the skin was the only available material. They sewed clothes and shoes, household items and jewelry from it, created musical instruments and even dwellings. In different parts of our planet, leather products belonging to different eras are still found. Each culture leaves an indelible imprint on any work of art, any craft, including leather.
Today, in the century that brought the discovery of synthetic materials to mankind, the most valuable are still natural materials and forms. Interest in the skin does not dry out. Handmade has its own amazing beauty. The master forgets about the achievements of civilization and becomes on a par with many generations of creators who have preserved their art for centuries.
Leather processing methods have not changed much. But the man and his worldview have changed. There are new techniques, new styles. After all, every true artist always seeks and creates something new, embodies his understanding of the world in any material. But only by mastering the technique to perfection, you can create a true work of art!
Master class progress:
Safety precautions when working with a stabbing tool:We call a piercing tool: an awl, needles.
1. Check tools before work.
2. Store the needles in the needle bed, wrapped with thread. The awl should be stored in a special container or case.
3. We work with the tool very carefully so as not to injure our hands and other parts of the body.
4. Do not bring the tool close to your face, protect your eyes, do not take it into your mouth, do not stick it into clothes and other objects, do not leave needles in the product.
5. Do not swing the tool. Don't throw.
6. If the needle breaks during work, inform the supervisor. A broken needle must be placed in a container specially designated for this.
7. At the end of the work, clean the tool from dirt, then put it in the case and put it in place.
Rules for handling scissors:
1. Before work, check the tool. Use well-adjusted and sharpened scissors.
2. Do not hold scissors upside down, do not carry them in your pocket.
3. Do not use scissors with a loose hinge.
4. Do not cut with scissors on the go, do not approach your comrades while cutting, do not leave the scissors with open blades.
5. Pass the scissors only when closed, with rings towards a friend.
6. Place the scissors on the table so that they do not hang over the edge of the table.
7. Monitor the movement and position of the blades during operation.
8. Use scissors only for their intended purpose.
Rules for safety when working with a candle and matches (lighter).
1. To avoid fire, before work, place a candle on a ceramic tile (saucer), then light it with matches or a lighter.
2. Playing with fire is not allowed!
3. Make sure that fingers, hair, clothes do not get into the candle flame.
4. It is strictly forbidden to work with a candle without a special tool: tweezers!
5. Do not put out the fire with your hands!
6. In case of a burn, immediately inform the manager.
7. At the end of the work, clean the candle from the old wax, throw the used matches into the trash can.
Safety rules for working with glue.
1. Do not open the adhesive with your teeth.
2. Apply PVA glue with a brush; glue "Moment" with an awl.
3. When working with glue, use a napkin.
4. Avoid getting glue on clothes, hands and face; when
rinse thoroughly with water.
Materials and tools:
1. Glue "PVA" and a container for diluting glue
2. Glue "Moment" transparent and container for glue (lid)
3. Shilo
4. Scissors
5. Brush
6. Needle with a thin eye
7. Transparent monofilament (you can use fishing line)
8. Pin
9. Mother-of-pearl beads and beads, white color
10. Piece of cloth
11. Candle
12. Matches or lighter
13. Tweezers
14. Cardboard for making templates

Let's make a work plan.
1. Selection of material.
2. Making templates from paper or cardboard.
3. Manufacturing of leather parts.
4. Processing parts using various technologies.
5. Decorating details.
6. Making the base and fasteners of the brooch.
7. Assembly of parts into a product.
Let's get to work! Today we got scraps of genuine leather of two types: thin leather and thin leather with perforation over the entire area of white color. If your trimmings are very wrinkled, then the skin can be stroked. To do this, we need an iron and a piece of cotton fabric.

We lay out the skin, cover it with a cloth on top, set the iron to "cotton" and quickly iron it.

Now we take the templates and cut out the required number of details from the leather. We will need:
8 pieces of petals No. 1 and No. 2 - cut out 7 pieces each from ordinary white leather and 1 piece each from perforated leather;
1 piece petal No. 3 - from ordinary white leather;
2 pieces of petals No. 4 - 1 piece from ordinary white leather and 1 piece from perforated;
1 piece - item No. 5 fringe base for the middle of the flower from plain white leather.
We cut out detail No. 6 oval - the basis for a brooch in the amount of 1 pc.
It is also necessary to make a circle (item No. 7) from cardboard with a diameter of 2.5 cm.

With the help of a pen, we carefully transfer the templates to the skin without an allowance, laying them as compactly as possible so as not to waste excess material. If there are scuffs on the skin on the front side, then we bypass these places.

With scissors we cut out details from the skin, not forgetting the safety rules. After all the details are cut out, we need to use scissors to make notches around the perimeter of all the petals, as shown on the cardboard template.

Now we will process the petals using the technology of processing the skin using an open flame (candles). Let's remember the rules of working with fire. Be especially careful! We will need: a candle, matches, tweezers and leather blanks. So, we put a candle on a saucer, light it with matches (lighters), grab a petal with tweezers and quickly draw a candle flame to the side.

The notches should, under the influence of heat, disperse and become more prominent.

Let's take a strip of skin. We retreat 5 mm and draw a line along the entire length with a pen. We make cuts with scissors to the intended line along the entire length with a width of 2 mm. Here is such a fringe!

Now we take PVA glue, a brush, a piece of cotton material and a small container. We dilute a small amount of PVA glue with water, in the ratio of 2 parts of water to 1 part of glue and mix thoroughly. We apply the solution to the wrong side of the parts.

Then we put it in the middle of the fabric.

And wrap like candy.

The fabric will absorb the excess solution. And this method helps to achieve small folds on the petal. Carefully unfold the fabric, take it out without unwinding the parts, and leave them to dry.

We also act with a strip of fringe: we coat with the composition and manually twist the chopped fringe in several pieces. We leave to dry. This is how the fringe turns out on the front side.

And this is a view of our fringe from the wrong side.

While we are doing the next stage of work, the petals and the fringed strip will dry out, become more rigid and will hold their shape better in the product.

And we will make the middle of our brooch! To do this, we need a circle of cardboard, a piece of white fabric, scissors, a needle and thread. Cut out a circle with an allowance of 1-1.5 cm from the fabric.

And we sew a cardboard circle, pulling the fabric on the back side. Here's what happened!

We begin decorating the middle of the brooch. We need mother-of-pearl, white beads and beads, a thin needle with a narrow eye and a transparent monofilament. We arbitrarily embroider the blank on the front side first large beads. Do not forget about safety rules when working with a piercing tool!

Then we fill the space between the beads with small beads. This is the beauty we have!

The turn has come to the manufacture of the base and fasteners of the brooch! We take our oval blank made of leather. Lay out a pin in the center of the oval on the wrong side and mark the places for future cuts.

Then we cut it according to the outlines with scissors (you can use a clerical knife). And insert the pin into the holes.

From the front it looks like this:

We remember our petals - they have already dried up and they must be carefully unfolded! Here are the blanks for the brooch we got:

I wanted to add a "zest" to the product, and decided to embroider one of the small petals with beads and beads. Here's what happened!

All the details are ready, we begin to assemble the "Snow Flower" brooch! We take a center embroidered with beads and beads, a strip of leather cut and processed with PVA glue, an awl and Moment glue. On the front side of the strip, carefully and carefully with an awl along the entire length, apply a thin layer of Moment glue. Glue to the middle.

Since we glued the fringe, slightly stretching the skin, we left an extra piece. Cut it off carefully with scissors.

Rear view of the center of the flower:

We begin to make out the base with a pin with large petals. We coat the back of the petal with Moment glue by 1/3 and glue it in turn to the wrong side of the base clockwise, overlapping each other a little and forming small folds.

Here's what it should look like: front view.

And this is the back view of the brooch.

Now we take the middle of the flower with cutting and small petals. Here we coat with glue "Moment" on 1/3 of the front of the petal and glue it to the middle in a clockwise direction.

We also place and glue where we like, arbitrarily long narrow petals No. 3 and No. 4. This is what the top of the brooch looks like! Now selectively leaving different lengths, cut with scissors cutting around the middle.
Do not rush to throw away old leather things - you can make very interesting and stylish accessories out of them. Handmade leather flowers will decorate your bag, hat, jacket or favorite hairpin, making your favorite item exclusive.
How to make a flower out of leather?
To make leather flowers, we need the following:
- a sheet of paper for patterns;
- shreds of skin, in our case black;
- safety pin;
- glue "Moment";
- PVA glue;
- scissors;
- candle;
- ruler;
- tweezers.

If you do not have shreds of genuine leather, artificial leather is quite suitable for making flowers.
Technology for making flowers from leather
- First, cut out the blanks of petals from paper. You can take paper of any density, ordinary office paper is quite suitable. We make 4 sizes of blanks for the petals. The dimensions of the blanks are determined from the desired size of the flower, or from the calculation of skin patches.
- Next, transfer the blanks to the skin and cut out the petals. We will need 6 petals of each size.
- Now let's start working on the petals. To do this, we need a regular ruler, preferably plastic and transparent, and Moment glue. Take the first petal and divide it in half, mark the dividing line with a bend or a simple ballpoint pen.
- Then take a tube of glue, drop it on a match and apply it in a thin strip along the center line.
- Now we bend the petal in half, put a ruler on top, covering the petal by 1.5 - 2 mm. Let's focus on the picture.
- We hold the work in this position for several minutes, allowing the glue to stick. After that, remove the ruler, open the petal. It turns out this form.
- To give him nice shape, put on a flat horizontal surface, cover again with a ruler, but from above, make sure that the bend does not stick out. Next, we put the load on the ruler and leave it for a while, allowing the work to dry.
- We do the same actions with absolutely all the petals of a flower made of leather. Let's pay attention to the fact that in smaller petals the bend should be made smaller.
- Next, take a piece of skin for the middle of the flower, select the six largest petals and arrange them in a circle on the piece. Let's make a mark of what size circle we should cut.
- Now boldly cut out a circle - this will be the core of our exclusive leather flower.
- Finally, all the blanks we have prepared, let's deal with the processing of the petals. We take each petal and grease it with a thin layer of PVA glue. This is a necessary moment, without this we will not be able to melt the petals well over the candles.
- When all the petals are smeared with glue, we proceed to melt them. We take the first petal, firmly clamp it with tweezers, light a candle and hold the petal over the flame until the edges melt. It is important not to overexpose here - the deformation should be easy.
- We hold over the flame first one half of the petal, then the other. The tips should be bent, and the petal itself should acquire a convex shape.
- We do the same with all the petals of our future flower.
- Next, we take the “Moment” glue and begin to glue the petals in a circle on the cut out middle of the flower. We start gluing from the bottom row - the largest. We make sure that the gaps between the petals are the same.
- So one by one glue all the petals. Actually, our exclusive leather flower is already ready, it remains to make it an ornament and transform it a little.
- The most versatile decoration is a brooch, so we will make a clasp at the bottom of our flower. Cut out a leather circle and a small rectangle.
- Next, take a pin, open it, put it on a circle and fix it with glue using a rectangle. It turned out such a simple design.
- Now glue the clasp to the flower.
- Lastly, let's decorate our masterpiece. To do this, you can use buttons, beads, beads, ropes.
- We will transform our brooch with a button, having previously covered and glued it with leather. Glue the button to the center of the flower.


 |
 |
 |
 |


 |
 |
In this way, you can easily and simply make flowers from leather with your own hands. Such flowers can become the basis of a homemade
Shop shelves littered with Chinese “masterpieces” and women of fashion walking in “creepy roses” force true connoisseurs of beauty to make flowers out of leather with their own hands. Making such accessories is not difficult, especially since the game is really worth the candle.
And although leather is not a malleable material, it is possible to master the art of processing it. From a small piece of leather, the needlewoman is able to create such artificial flowers that even the most nondescript jacket, bag or pair of shoes will bloom literally before our eyes.
Leather flower on a brooch

If you are going to make a flower out of leather with your own hands, for example, in the form of a chamomile, stock up on related materials:
- 5 stencils
- pen
- scissors
- thick needle
- glue (both "Moment" and PVA are suitable)
- bead or button for the middle
- strong threads
- pin (if you still firmly decided to make a brooch).
If an old leather jacket or a bag that has become out of date is used, it is advisable to wipe the material with a sponge dipped in soap
Before cutting the skin, prepare a cardboard template (it is possible that in the process of drawing your ideas about the future brooch will undergo transformations). Only after that we put the blank template on the wrong side of the leather flap and begin to cut out the petals. By the way, they do not have to be round - pointed edges look more extravagant. Those who have at their disposal skin of different shades, but the same texture, are doubly lucky: such seven-color flowers will become real highlights of your image. If you get carried away, do not forget: the part cut out according to the largest stencil must be made in duplicate.

Very sharp scissors are well suited for cutting flowers from leather with your own hands - this way the process will go faster and easier
After cutting out the pieces, fold them on top of each other. The overlay process proceeds from the largest component of the future brooch to the smallest. We fasten the workpiece with a thick thread threaded into a thick needle, carefully piercing the middle of each part. What will be the "core" of your leather flower - a bead, a button or a buckle - is sewn on last.
One of the two largest parts is temporarily set aside. She is destined to be the main exclusive brooch. We measure the pin and make holes in the leather base at the appropriate distance from each other. Lubricate the bottom of the flower with "Moment" (or PVA) and gently press it to the base.
This additional layer not only fixes the pin, but also keeps the shape of the brooch perfectly.
Flower on the headband
An elegant flower made of leather with your own hands can become a full-fledged accessory that adorns your fair head. Moreover, this dahlia, which we propose to “plant” on the headband, is in no way inferior in beauty and grace to a diamond diadem. After all, each petal of this leather dahlia is practically a piece of jewelry.

By choosing beads or imitation pearls, you can make an elegant headband in just a few hours. For its tailoring, a minimum is required:
- A leather bag lying around in the pantry
- Pearls (can be artificial, but good quality and preferably different sizes)
- Durable elastic band
- Sewing machine
- Glue (preferably hot)
- Scissors
Have you submitted your dahlia yet? The flower can be small, neat, or it can cover half the head: this is up to you. Cut out 15 pieces of petals from a piece of skin different sizes(large, medium and small). At first, it can be just squares, which you will gradually turn into rounded petals with the help of sharp scissors.

In this case, the “roundings” should be the same - so everything will have to be done according to the template.

Before you take on a tube of glue, imagine how the petals will be placed in the future flower. Only after that start attaching the petals of the big size to the round base.


Then the turn of medium petals will come, and only then - small ones.

After laying out all three layers of leather petals, make the core of the dahlia, decorating it with pearls or a bead.
Now it's the turn to make the bezel itself. For this, the handle of the bag is suitable. Having measured the circumference of the head, cut out a strip, 7-8 centimeters less (this is a reserve for an elastic band). You can sew an elastic band by hand, but sewing machine yet more convenient.

Carefully attach the dahlia and you can conquer those around you with your creative work of art. A young lady whose head is decorated with such leather flowers can count on the title of the most charming, attractive and extraordinary.

flower necklace
A necklace is another option for a worthy use of leather flowers.

To give the flowers the necessary volume, use ready-made sepals (for the sake of such a case, you can disassemble one of your bracelets). Traditionally, we cut out several blanks for a flower of various diameters from leather. Then we glue the largest blank to the metal or plastic sepal and boldly glue smaller petals on it.

You can use scrapbooking flowers and pearl beads to decorate the heart of the flower. And also add some fabric flowers to the necklace
Are all the flowers picked and dried well? Fine! It's time to collect them into an exclusive decoration. Arrange the flowers on a sheet of paper in the order you want to see them on the finished necklace. Then take a pencil and carefully trace the resulting “clearing” along the contour, departing from the edges by 0.5-1 cm. In this way, you will make a pattern for the base of the future necklace. In total, you will need 2 such patterns (in mirror image).

After the bases are cut directly from the skin, glue them together with Moment or a hot gun. You can also glue the ends of the fishing line inside, on which the beads were previously put on. So they will hold on tight and will not run away anywhere.

After the base is thoroughly dry, you can start gluing the flowers. "Plant" them in the order in which you originally planned. First, large flowers, and between them - small ones.