Organza is an attractive, weightless material, and flowers made from it are especially fragile, feminine and realistic. This master class provides examples of creating colors of different complexity, which you can use to enrich jewelry, accessories, clothing, and so on.
simple flower

To create this flower you need:
- circle templates, the diameter of which will vary slightly,
- organza of the required color,
- candle,
- glue gun or needle and thread,
- additional decorative material (beads or seed beads).
To get started, create templates. You can outline glasses with necks of different diameters on cardboard and draw a six-leaf leaf with large, barely defined petals.
After this, fold the fabric several times, trace one of the templates and cut it out. 
You should get five or six large circles, five to four medium ones and four to three smallest ones.
After cutting, carefully singe the edges of the circles over the candle. 
After that, start collecting the flower. It can be sewn or glued. 
First, glue all the large ones in one place in the middle, the middle ones on top of them, and add the small circles last.
Decorate the middle of the workpiece with beads or beads.
The finished flower can be placed on a hairpin, elastic band, or used for other decorative purposes.
double flower

To make such a flower you will need:
- organza or veil;
- paper;
- scissors;
- tweezers;
- candle and matches;
- felt;
- brooch pin;
- decorative beads;
- needle and thread;
- thick cardboard;
- universal glue.
First you need to make 3 paper templates in the shape of circles of different diameters: 8 cm, 9 cm and 10 cm.
Then cut out 4 pieces of each diameter from organza. For convenience, you can fold a piece of organza in four and cut out a circle. 
Fold each resulting circle in half and cut the folds with scissors 1 cm short of the center. 
Hold the uncut tip of the workpiece with tweezers and round the corners. It should look like in the photo. 
Unfold the workpiece and singe each petal over a candle flame, while bending the remaining petals. 
Spread the petals apart and scorch the edges between them. 
Do this with all the pieces and start assembling.
For comfortable assembly, thread the needle and stick its eye into the cardboard.
Starting with the largest one, thread all the petals one by one on the needle, straightening them. 
When all the petals are collected, take out the needle and sew the middle of the flower several times, decorating it with beads. The flower is ready. 
To make a brooch out of it, cut a felt circle slightly larger than the size of the pin. And make small slits in it to insert a pin. 
Using all-purpose glue, glue the felt and pin to the flower base. The wonderful flower brooch is ready!
Peonies flowers

To create flowers you will need:
- any organza;
- flower and petal patterns;
- pins;
- needle and thread;
- disappearing marker or chalk;
- pincushion or piece of foam rubber;
- beads, rhinestones;
- scissors;
- candle and matches.
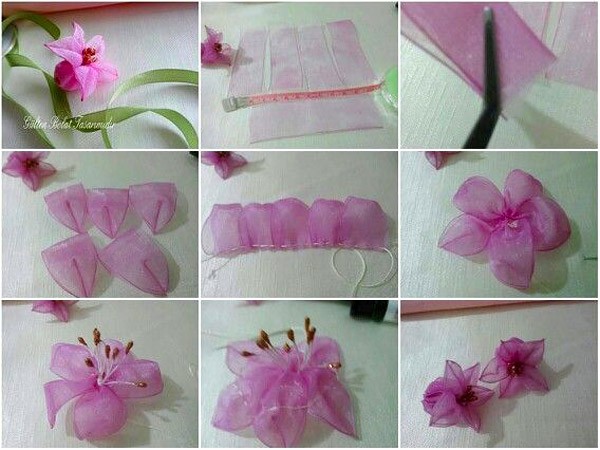
Templates for the petals must first be cut out of cardboard. The template can be absolutely any shape. We suggest you draw several five-leaf leaves of different diameters, as well as several individual petals in the shape of hearts.

Attach ready-made templates to the fabric and trace with a marker. If you need several identical petals, then fold the fabric in several layers. Secure each piece with pins and cut out. There is no need to do this perfectly evenly, since in the future the edges will be burned, and on a living peony, all the leaves are different and slightly torn.
Once all the pieces are cut out, start firing. Carefully pass each petal over the candle flame. They should melt a little and curl up. Some large petals can be slightly cut to create a ragged effect.

Now arrange all the pieces according to size. Insert a needle and thread, eye down, into a piece of foam rubber or something soft and sequentially string five-petal blanks onto the needle, from largest to smallest. The number of layers can be arbitrary, for example, 4 large, 3 smaller, 3 even smaller and 4 very small. The middle of the flower can be decorated with petals of a different color, beads or small single petals.


To form a flower from heart-shaped blanks, you will need 5-8 petals of each size. Collect them on the needle in a circle, stringing them one at a time by the sharp part, starting with the largest elements. Each subsequent petal is laid overlapping the previous one.


After the flower is collected, it is carefully sewn together with several stitches in the center, making sure to capture all the petals. If desired, the middle can be decorated with beautiful beads or seed beads. And with reverse side sew on a safety pin or a special fastener.
Rolled up rose

To create such roses you should prepare:
- any organza and satin ribbon;
- soldering iron with a sharp rod (100 W);
- glass;
- needle and thread;
- glue gun
First you need to make 3 petal templates of different sizes. To make them, it is better to choose a material that is resistant to the heat of a soldering iron. Tin or thick cardboard is perfect for this. In this case, we used an empty bottle of hairspray; it can be easily straightened and cut. To avoid injury, it is better to sand the edges.
You will need a small piece of glass; we will use a soldering iron to cut out the petals on it. After work, stuck organza residues can be easily removed when they have cooled.

To form one rose, you need to use a soldering iron to cut out 10 petals: 3 large, 3 medium and 4 small. It is better to cut them on the bias.
Fold each petal in half lengthwise, inside out, sew along the edge with matching threads and pull together.

Twist the rose petals sequentially, securing them with threads or a glue gun.
Start from the middle - roll a small petal into a tube, and attach the rest around it in ascending order.

A rose with petals of different shades will look quite interesting. You can also play with the texture of the fabric.
Volumetric rose

To make a voluminous rose, prepare:
- organza ribbon - 2 meters;
- paper;
- candle and matches;
- needle and thread;
- scissors.
Cut out three petal templates from paper: large, medium and small. You will need 15 pieces of large and medium petals, 12 pieces of small ones.

Fold the ribbon the appropriate number of times and cut out the required number of petals.

Burn the edges of each petal, carefully passing it over the candle flame.
Take three small petals and fold them into a fan.


The uniqueness of the image does not depend on the cost of the outfit, but on the exquisite little things that make it perfect. Organza flowers purchased or made with your own hands will be an ideal addition not only to wedding or evening dresses, but also for children's dresses.
Can be used as decoration for curtains, decorations for postcards and for many other small things. The use of these cute compositions depends only on your imagination. To make flowers, you need to understand how the fabric will lie in the finished product. First, let's look at the properties of fabric and types of organza.
Organza - fabric description
Organza was previously made from silk, then from viscose. Modern manufacturers use polyester thread - the fabric is transparent and weightless, but at the same time rigid and holds its shape well.
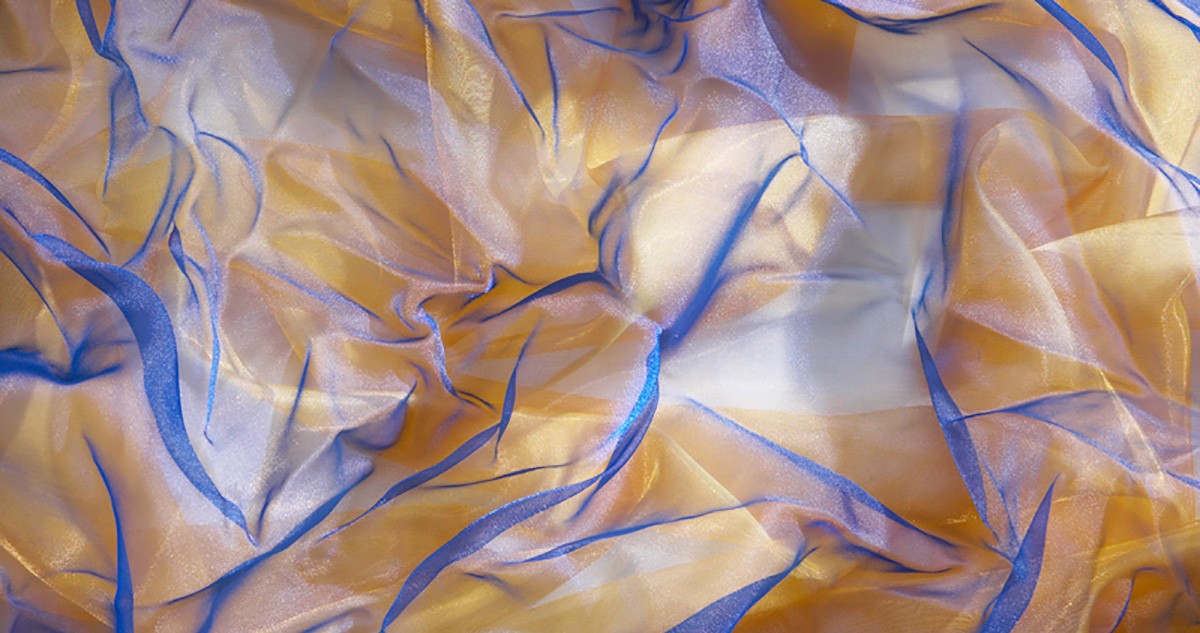
This is ensured by tightly twisting two threads together, and depending on their thickness and color, the results are different kinds fabrics:
- matte or shiny,
- gradient or chameleon,
- plain or rainbow
- with spraying of various colors,
- with jacquard pattern or embroidery;
- tape of various widths.
Not every fabric is suitable for making flowers. For example, organza with embroidery is used to sew curtains or dresses. Matte and shiny plain fabrics are the most popular among needlewomen.


Shiny organza is a favorite material for flowers on bows,
hair decorations and brooches
Spectacular flowers for bright outfits are made from coated organza.

Sprayed organza looks festive, and flowers made from this fabric would be appropriate in a bride’s outfit
For romantic looks, fancy flowers made of gradient organza, chameleon or patterned fabrics are suitable.

Gradient organza is great for fantasy looks

Organza chameleon - for complex, iridescent colors

Gradient colored ribbon produces charming flowers that can be used to create bouquets, including embroidered ones.

A cute summer look will be complemented by a patterned organza flower.
It’s easy to create organza flowers with your own hands – the main thing is to know basic techniques. For this purpose, Krestik has prepared a review of simple master classes.
Basic principles of creating flowers from organza
The creation of any, even the most exquisite, flower or complex composition begins with preparing the parts and connecting them in a certain sequence. Needlewomen have come up with several techniques with the help of which floral masterpieces are born:
- classic with buns,
- with heat treatment,
- kanzashi,
- from ribbons.
It is easier for beginners to master the technique using heat treatment of petals, while experienced craftswomen create their masterpieces using several techniques.
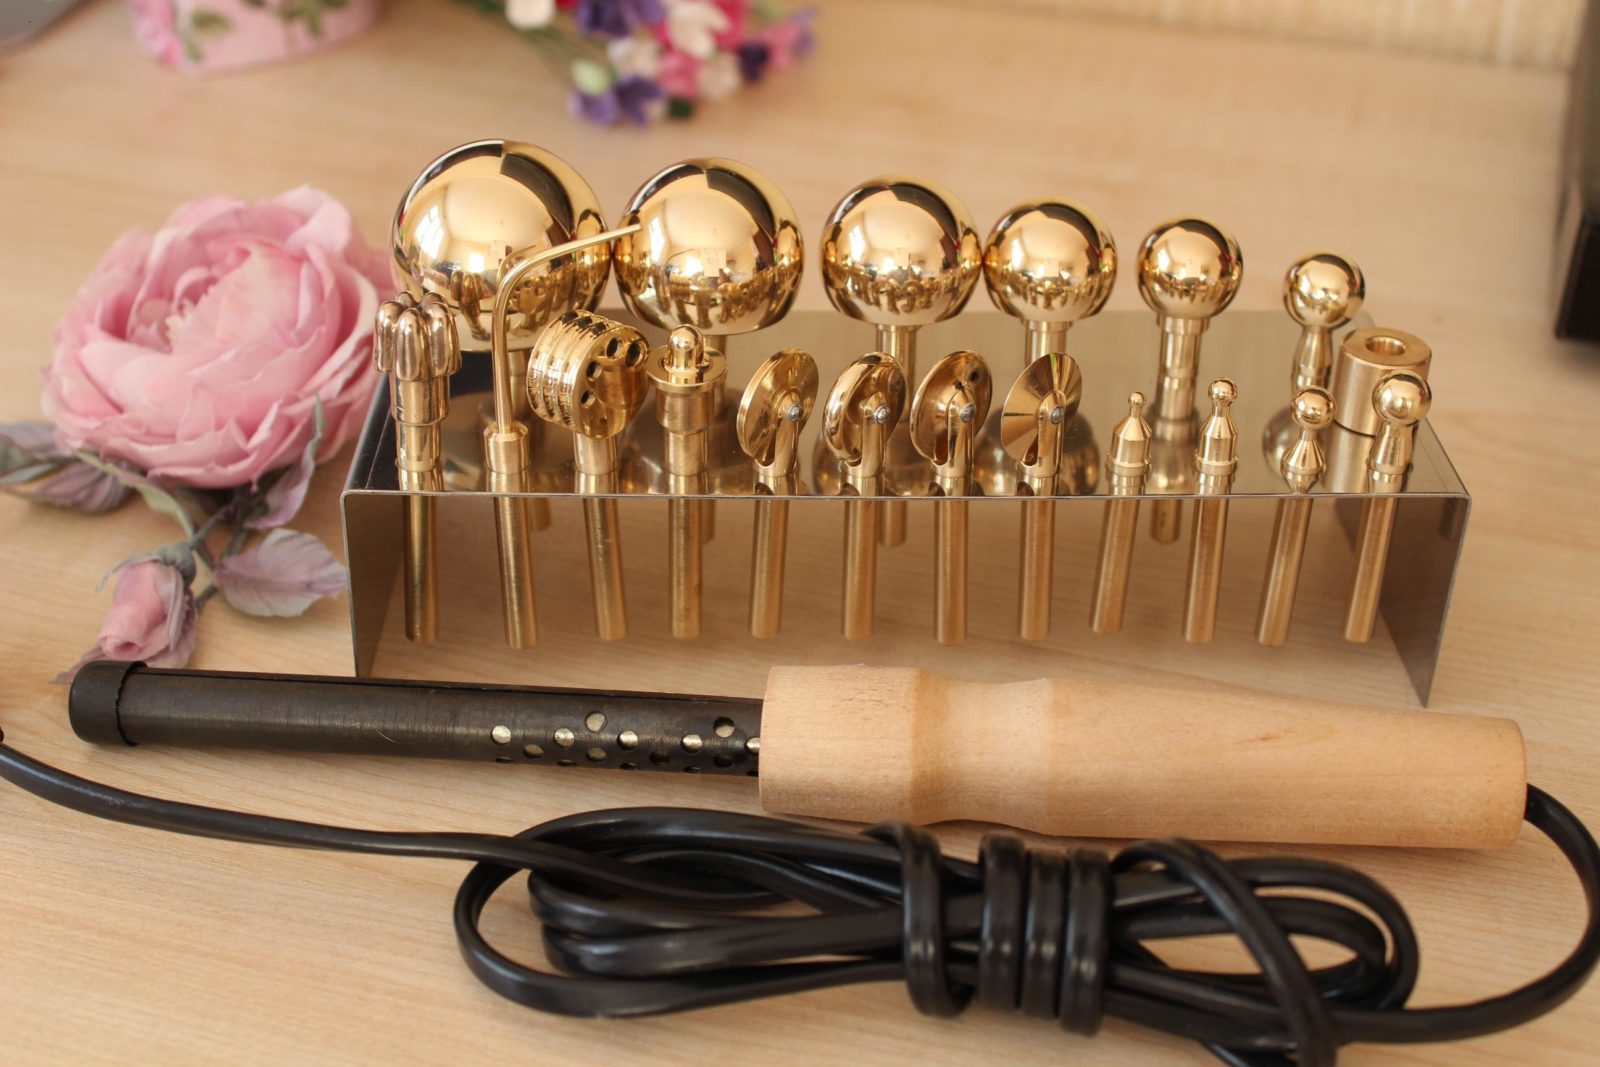
Classic floristry

This technique is called silk floristry or Japanese technology. The ancient art of creating flowers from silk came from Japan. However, it is also applicable to other fabrics: viscose, cambric, organza. To make flowers you will need a soldering iron and a set of special brass tools on a handle. It includes round balls of various diameters - boules, as well as smoothers, knives, heels, hooks, dies and special tools for chrysanthemums, lilies of the valley and fantasy flowers.
The petals are cut out according to the pattern, starched or kept in gelatin and dried - due to this, the edges will not fray, and the petal will keep its shape.
YOU WILL NEED IT
The archive will be useful when creating them. Free download!
To give natural bends, the blank petal is placed on special pad and pass over it with a hot tool. Then a flower is assembled from the finished petals on a thread.
MK on making flowers using Japanese technique:
Simple flowers with heat-treated edges
Preparing the petals is similar to the classical method: you need to cut the blanks exactly according to the template.

To prevent the edges from fraying and fraying, they must be processed. This will require a candle. Since organza is made of synthetic fabric, it does not burn, but melts. This is simplicity and complexity at the same time: the petal easily takes on the required shape, but it must be melted carefully, otherwise you can ruin the workpiece by melting the excess. The peculiarity of the melted edge of organza is a rounded edge of a darker shade. Thanks to her, the petals look especially charming.

The flower is assembled onto a thread, and the core is decorated with beads, beads, and sequins.
The flower will look more organic if the petals are not connected directly in the middle, but each one is moved a little.

Kanzashi
This technique is universal because it allows you to make flowers both from blanks cut from fabric and to use organza ribbons. The point is that each petal is a fabric folded many times. Individual elements can be fixed with a thread or the edges can be melted over a flame, thus gluing them together.
The technique is most suitable for creating small flowers intended for decoration, photo frames, cards, decoration gift boxes and to realize countless creative ideas.
Instructions for making organza flowers using the Kanzashi technique:
Ribbon flowers
This technique is the first step in and an excellent option for beginning craftswomen. The organza ribbon has an edge, so the petals look neat, and only the edge needs to be treated with fire. The width and length of the ribbon depends on the intended size of the flower. Creating flowers using this technique is an excellent option for joint creativity with children.
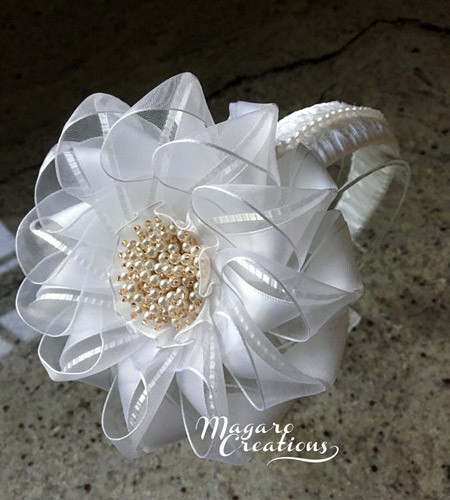
Exquisite organza flowers for special occasions
In the techniques discussed above, the edges of the petals are subjected only to heat treatment. You can add chic with a special finish instead of melting or on top of it. This flower will become an exquisite decoration for a wedding bouquet or a delicate decoration for clothing. Let's learn how to create elegant flowers from organza, and the master class will help us with this.
For making this type of flowers, organza is an ideal option, since it is quite rigid and will withstand the load of glitter or small beads glued to the petals.

To make flowers we will need:
- organza,
- transparent fabric glue,
- white or silver glitter,
- scissors and pins,
- sewing needle and thread to match the fabric.
First step. Cut out petals according to the template. The required quantity and size depend on your idea. For a delicate cup stand, two petals are enough.

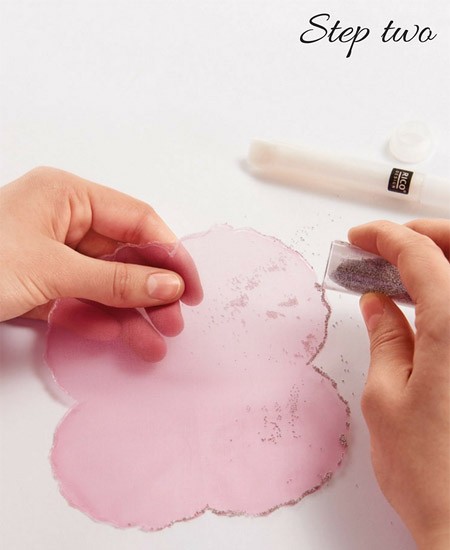
Second step. Gently coat the edges of the petals with transparent glue, sprinkle them with glitter and dry.
If you are creating a flower to decorate clothes, then it is still better to melt the edges over a candle - this will prevent the threads from fraying, and then decorate with glitter.
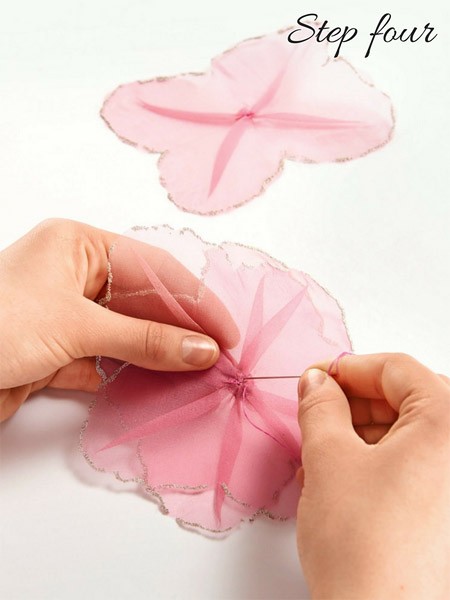
Third step. Using a thread to match the fabric, sew large stitches into the middle of the petal. When pulled together, folds are formed that need to be secured with additional stitches. If you are making a napkin for a cup, you just need to slightly tighten the folds and then straighten them, giving the flower some airiness.
If you are new to flower making, first practice on scraps to select the appropriate fold size.

Fourth step. Connect the finished petals into a flower with a needle and thread. The middle can also be decorated with glitter or beads. The finished flower head is glued to a wire or a wooden stick, which, if desired, is decorated with floral tape.
Here you will find the original of this master class, from which you can download the part templates!
Flowers that are more sophisticated and interesting are made more difficult, but careful adherence step by step instructions will help you cope with the task!
Master class on creating a dahlia from organza:

Master class on creating organza lilies:
Original examples of using organza flowers
As a rule, fabric flowers serve as decoration for wedding and evening dresses, hats, clutches, romantic or in the form. But mini-compositions have a special charm.
Used to decorate the groom's suit, and individual small flowers make excellent decor or photo frames.

An accordion is assembled from a strip of organza onto a thread and a needle. Then a crown is cut out of felt.

Using transparent glue (or thread), the crown is fastened into a ring and sits in the center of the organza skirt.

The final decor is optional: beads, lace, sparkles, pendants. The crown can be attached either to a hairpin or a clip-on clip. Your little one will be delighted!
Decorating wedding dresses is a limitless field for imagination. You can use large beads and a narrow organza ribbon to crochet into a necklace or bracelet.

Organza is a great material for creating delicate, elegant or chic and catchy flowers. A variety of techniques will allow even novice craftswomen to create masterpieces.

To make a flower we will need:
Organza
Scissors
Candle and lighter or matches
Brooch pin
Decorative beads
Needle with thread
Cardboard shoe box lid
And a great desire to create
First, we make paper templates, 3 circles of different diameters. I offer diameters of 10 cm, 9 cm and 8 cm.
We cut out 4 pieces of each diameter from organza. For convenience, fold the organza 4 times and cut out a circle.

We fold each circle twice, cutting the folds 1 cm short of the end.


Hold it by the uncut tip and round the corners. This is what should happen:


The blanks are ready for further processing. Burn the petals over a candle.


Moving the petals apart, we singe between the petals.

The singed petals are ready for assembly.

For ease of assembly, I suggest making the following device (The idea is not mine, I saw it on the Internet. Thanks to the author.) Thread the needle and insert the eye into the cardboard box.


We string the petals onto a needle, starting with the largest. In the process we straighten it, giving it a beautiful shape.

When all the petals are strung, pull out the needle, stitch it several times and secure it.

Decorate the middle with beads. The flower is ready. If you want to make a brooch, then continue!

Cut out a circle from felt, slightly larger than the size of a pin. We make small slits to insert a pin.

Glue the pin to the flower with glue. Our brooch is ready!


What your flower will be like depends only on your imagination! Good luck and creative inspiration to you!
You can see my other works here:
If you are used to making small handicraft masterpieces with your own hands and, as often happens, you have pieces of organza lying around in your creative bins, then a great idea would be to make very delicate flowers from it. You can use them as a brooch, decorate a hairband, handbag or bracelet with them, or perhaps you can come up with some original use for them. The great advantage of these flowers is that they do not wrinkle at all, and if they suddenly get wet, they can simply be left to dry in the air - their petals will straighten out again and will delight and delight others!
Another interesting point is the unusual method of work in their manufacture. Once you start creating your little wonderful masterpiece, you will certainly appreciate how exciting and interesting it is to scorch organza on a candle!
You will need:
- candle and matches;
- scissors, pins, needle and thread;
- a simple pencil, possibly also a compass, ruler and eraser for creating a pattern;
- a piece of checkered paper;
- organza scraps;
- beads, beads, pearls or sequins depending on your imagination.
First, on checkered paper, draw a flower with a diameter of about 12 cm with 5 or 6 equal petals. If you want the result to be a water lily, make 4 round petals, and if you want a chrysanthemum, make 12 oblong petals. But starting with chrysanthemum in this technique is not the best best idea, because in order to singe 12 thin petals, you must already have at least a little skill and experience. The most optimal is 6 petals. Subsequently, you can vary the number and shape of the petals, as well as the diameter of the entire rosette.


Then we cut out the paper pattern. We fold the organza into 4 layers and, placing the pattern on top, pin everything together using pins. Now roughly cut out the flower along the contour. Organza is a difficult material, its layers slide and shift all the time, but this should not upset you at all at this stage. Anyway, the final shape of the flower is given not by scissors, but by the light of a candle. Therefore, if your petals are uneven, crooked and unequal, this will only make the flower look more alive and natural. In each blank, we cut the petals towards the middle, leaving an uncut area right in the middle with a diameter of about 1 cm. In total, you need to cut 8-12 blanks from the fabric.


Now let's begin the most exciting stage of making a flower. Light a candle and begin to carefully work on the edges of each piece. We take one piece and singe its edges in the flame. Organza is a synthetic material, and simply bringing the edge of the flower to a distance of 2-3 cm from the side of the flame is enough for the cut to melt. To make the form more alive, you need to bring it not only to the side of the flame, but also above it. The secret is that when you hold the cut above the flame 5-6 cm above the candle, it not only melts, but also bends beautifully, acquiring fancy wavy curves of the edges. Here you need to be very careful not to singe your fingers and not to burn, or rather, not to melt the entire workpiece completely. The petals will be unequal, with different curves and different lengths. This is fine. The melted edges, as a rule, turn out darker than the tone of the fabric, especially if the candle smokes during operation.


After all the pieces have been worked out, we begin assembling the flower.

Organza is a stunning and airy material from which gorgeous outfits are made. You can easily make gorgeous organza flowers with your own hands with a candle or lighter on hand. Since the fabric can melt, by melting its edges you can create any flower design.
Organza flowers are made from circles different sizes. Each circle must be carefully burned over a candle or using a lighter. Then all that remains is to collect all the petals and sew them together.
After being treated with fire, the fabric takes on an unusual appearance. Assemble the flower - sew it in the center and decorate it with beads. 
If you cut flowers with petals or squares, for example, from organza flaps, then after processing and assembly they will turn out perfectly.

Flowers from circles folded in four
Another type of organza flower is a little more complicated. Here you need to cut out circles of the same size and singe each of them along the edge. Then, one by one, fold each circle in four and stitch it with thread.

If the fabric is of a different color or structure, it will turn out pretty original flower, which can be used to decorate curtains or make a composition.

DIY organza roses
Stiff organza makes gorgeous roses. In order to make a rose, you need to cut a ribbon about one meter long (the excess can be cut off) and 5-6 cm wide. 

Depending on which way you wrap the petals, the appearance of the flower will be different. If organza rose petals are wrapped inside, it will be a bud. By the way, you can use a shorter ribbon for the bud.


