Delicious chocolate eggs with a figurine or other surprise inside have their own interesting story. Every fan of Kinder Surprise products will probably want to remember the best Kinder Surprise collections of the 1990s, because in the 20th century such beloved toys were produced: hippos, crocodiles, lions, ghosts, frogs, sharks, etc.
Toy series in the 21st century are also often interesting, although true Kinder Surprise fans are convinced that the quality of these souvenirs and surprises is no longer the same.
Kinder surprise collections
Every year, the creators of chocolate eggs with toys for children try to surprise their fans by coming up with new series of collectible figurines.
I offer reviews of different Kinder collections Surprise Maxi and regular Kinder Surprise, presented in Ukraine:
Kinders 2019
Kinder surprise 2018
Kinder surprise collection 2017
Kinder history of creation
Let's also plunge into nostalgia for the past together and remember how chocolate eggs were created, in which a plastic capsule with a toy is hidden, who invented Kinder Surprise, what were the best Kinder collections of the 1990s and what variations of Kinder Surprise exist today.
Delicious chocolate eggs with a capsule containing a surprise for a child were invented in Italy. In Kinder Surprise's native language, these treats are called Kinder Sorpresa or "surprise for children."

The popular Kinder Surprise trademark is owned by Ferrero (Italy). But the idea to produce such surprises (chocolate + toy) belonged to William Salice, who worked for many years at Ferrero and helped its owner Mr. Ferrero a lot, and also wanted children to like chocolate eggs all year round, and not just at Easter.
The world's first Kinder Surprise was released in the early 1970s, although chocolate eggs with figures in them were sold before. It’s just that Ferrero managed to popularize Kinder Surprise around the world.

The younger Ferrero, who continued his father’s work at the Ferrero factory, did not like milk since childhood, although he understood that it was very useful for a growing child’s body. So he decided that chocolate surprise eggs would be healthier if they had a higher milk content (from 32 to 42 percent). Thus, Kinder Surprise has become not only interesting due to the surprises inside, but also useful due to its properties.

In the history of kinders big role The designer of the first collectible toys, Henry Rotu from Switzerland, also played. The first surprises that came across in Kinder Surprise eggs were mini children's construction sets.

Later, Henry Rotu came up with a series of metal figurines (soldiers, cowboys, Indians), then collectible ballerinas, sea pirates, representatives different professions etc.
Each collection sold out so quickly that it was soon decided to create lines of toys united by a common concept: cartoon characters, characters from fairy tales, etc.

The CIS countries remember very well the Kinder Surprise collections of the 1990s. The most famous then were the following series of toys:
- Crocodiles school students (year of graduation 1991)
- Hippos on vacation (1992 series, appeared in the CIS in 1996 under the name Happy Hippos Holiday)
- Lion cubs on a picnic with tents (year of release 1993)
- Frogs on winter holidays(year of manufacture 1993)
- Winter Penguins (released 1994)
- Sharks (year of release 1995)
- Ghosts (released 1996)
- Aliens (released 1998)
Each collection of Kinder Surprise toys is unique and created exclusively for this brand.

Kinder surprise in different countries
Although the younger Ferrero, who successfully replaced his father at the helm of the company, died in 2011, and William Salice, who invented the Kinder surprise eggs, died at the end of December 2016 at the age of 83, their invention continues to delight millions of children from different countries and today, as the story of Kinder Surprise continues.
Over the entire history of Ferrero, more than 30 billion kinder surprises have been sold worldwide.

Today, several types of surprises with toys inside are produced from Ferrero:
- regular kinder surprises
- Kinder Joy
- Kinder Maxi
- Kinder Maxi King
The brand name Kinder Surprise may vary slightly depending on the country: in Russian-speaking countries it is “Kinder Surprise”, in Germany it is Kinder Uberraschung, in Italy and Spain it is Kinder Sorpresa, in Sweden it is Kinder Kinderoverraskelse, in Brazil chocolate eggs are sold under the name Kinder Surpresa , in English-speaking countries called Kinder Surprise, etc.

In European countries, including Ukraine, Kinder Surprise chocolate eggs are very popular in the 21st century. But for residents of some countries they are practically inaccessible. In countries where it is too hot, they mainly offer Kinder Joy surprises. They are not as fusible as regular Kinder Surprise.
And in the USA, for example, the rules for such tasty toys are too complicated. In this country, it is important that the candy is accessible to children of all ages, and Kinder surprises usually contain the restriction that they are not intended for children 0-3 years old due to small parts. New laws allow Kinder Surprise to be sold in the US, but only if several conditions are met:
- The capsule inside the kinder should be visible from the outside (its edges should look out between the chocolate halves). This is the only way even a small baby will understand that there is something inedible inside.
- The toy in the capsule must be solid and large, without additional parts.

It is clear that ordinary kinder surprises (the same “Smurfs”, “Masha and the Bear”, “Kinderino”, “Parrots”, etc.) cannot be brought to the USA under such conditions, and a fine for unofficial import for each egg may amount to 2.5 thousand dollars.
Chocolate Kinder Surprise eggs are a favorite treat for most children. But a handmade gift is much better, because it is unique and made especially for the baby. Big kinder surprise can be filled with your child’s favorite sweets and others pleasant little things. To prepare such a surprise, you will need simple materials and tools, a little patience and imagination.
| The content of the article: 1. 2. 3. |
Kinder surprise made of papier-mâché
A papier-mâché egg is an original gift wrapping. You can put any filling inside: from sweets to toys. The size and thickness of the walls of the egg will depend on the size of the gift, so you need to immediately decide what will be inside.
To create an egg you will need:
- thin newsprint or napkins;
- PVA glue;
- balloon;
- brushes and paints;
- scissors;
- strong threads;
- deep bowl;
- water;
- printouts or pictures for decoration.
To get an egg that looks like a factory one, you need to select a picture with a branded inscription. But it is much more pleasant to receive not a simple gift, but an individual, personalized one. The child’s name can be pasted next to the company inscription, and a postcard signed on behalf of the creators of the Kinder Surprise can be placed inside the egg. The baby will be pleased to know that such a huge egg was prepared especially for him.
You can make a personal inscription in any text or graphics editor, choosing the appropriate size and font. It is better to print pictures on glossy paper - it is brighter and more colorful.
Pictures for printing with the inscription Kinder Surprise can also be downloaded on our website (images can be enlarged by clicking).


In modern stores you can buy ready-made papier-mâché, but it is easy to prepare it yourself. Cooking steps:
- Dilute PVA with water in a ratio of 1:1 or 1:2. Papier-mâché glue should be similar in consistency to milk. Too liquid will not be sticky enough, too viscous will make the mixture thick.
- Finely tear the paper and place it in a thin layer on the bottom of the bowl. Pour glue so that it covers all the paper.
- Place the next layer of paper on top and fill it with glue, making sure that there are no dry gaps.
- Repeat until the plate is filled with the paper-glue mixture.
- Lightly press the mixture with your hands to compact it and expel any air bubbles. Pour a thin layer of glue on top.
- Place the plate with the mixture in a cool place overnight.
- In the morning, check the readiness of the mixture by stirring it with a spoon. The paper should soften, making the mixture homogeneous.
- If there are thick lumps or dry pieces of paper left in the mixture, you need to add glue and leave it for another night.
The prepared mass for papier-mâché can be used within 2-3 days. If it starts to dry out, you need to add glue and mix until smooth.
Now you can move on to creating a kinder surprise:
- Inflate the balloon and tie it tightly with thread. The ball should be egg-shaped: round, slightly elongated.
- Place the ball in a bowl to make it easier to apply the mixture.
- Cut dry paper into strips, moisten it with water and cover the surface of the ball. This must be done quickly, otherwise the water will dry out and the paper will peel off. To prevent this from happening, the glued strips should be lightly sprayed with water while working.
- The ball must be completely covered with paper. The strips should be glued overlapping, and additional pieces of paper should be glued to the joints on top of the main layer.
- Start applying papier-mâché to the damp paper. Move from top to bottom, applying the mixture in small portions and spreading in a thin layer.
- You need to cover the entire ball with the mixture, leaving only the tail outside. Leave the egg overnight so that the glue dries and the papier-mâché becomes strong. You cannot remove the ball from the bowl - the mass may flow down.
- The papier-mâché on the top of the ball will dry out faster, so after 2-3 hours the ball needs to be turned over. This way the mixture will dry evenly. The process will speed up if you place the ball next to a battery or other heat source.
- When the papier-mâché is completely dry, you can apply another layer on top for strength. Before applying, moisten the bottom layer with glue, otherwise the top layer will fall off.
- The finished egg can be treated with sandpaper - its surface will become perfectly smooth. But if the wrapping paper will be glued on top, you can leave it that way.
- Cut off the tail of the ball to release the air from it. Cover the hole with paper.
- Carefully cut the egg in half or cut a door in it through which you can put a gift.
- Remove any remaining balls from the sides of the egg.
Now you can move on to decorating. The egg must be primed with white paint on all sides. When it dries, color it as you wish or repeat the design from the branded packaging. Wait until the paint is completely dry and stick on the inscriptions. To make the egg look more festive, you can decorate it with rhinestones, stickers, and ribbon bows.
You need to put a surprise inside the finished egg, connect the halves (or put the door in place) and carefully glue them with tape. Decorate the gluing area with a beautiful ribbon.
How to make a kinder surprise from papier-mâché is shown in this video:
Large kinder surprise made of plaster
This egg has special advantage- it is very durable. After unpacking the gift, the child will be able to use it as a box or toy house.

To prepare this kinder surprise you will need:
- dry gypsum mixture;
- water;
- paper;
- glue;
- spatula or spoon;
- small handsaw or long paper cutter;
- balloon;
- 4 craft magnets;
- gloves;
- sandpaper,
- gouache or acrylic paints, inscriptions and pictures for decoration.
The balloon must be inflated to a suitable size and tied with strong thread. Tear the paper into small pieces, soak it in glue and cover the ball in 2-3 layers. After each layer, you need to wait until the glue is completely dry, and only then apply the next one. When the top layer is dry, use a knife to cut a small hole, pierce the ball and pull out the pieces. Cover the hole with paper to prevent the plaster mixture from getting inside.
The gypsum mixture must be prepared following the instructions indicated on the package. It is important to strictly observe the proportions of the dry mixture and water, otherwise the solution will turn out to be too liquid or too viscous. The solution hardens instantly, so you need to act quickly: apply it to the egg in a thin layer and smooth it out. You need to wear gloves when working: the gypsum mixture sticks to your hands.
When the plaster is dry, you can proceed to processing the egg:
- Sand paper carefully in a circular motion sand the surface of the egg until smooth.
- Cut or saw the egg. It is more convenient to make a cross-section, closer to the narrow side of the egg. You will get 2 parts: a deep container and a lid.
- Glue 2 magnets inside the egg next to the cut, placing them one opposite the other. Glue 2 more magnets to the lid, placing them opposite the magnets in the egg.
- Cover the magnets with paper.
- Paint the egg, stick on inscriptions and pictures.
Watch a video showing the process of making a large egg from a ball and plaster:
Now all that remains is to put the gift inside - and you can give the egg to the baby. To make the surprise even more unexpected, the egg can be hidden in a box or opaque bag.
How to make a kinder surprise from chocolate?
Another option for a homemade surprise is a large chocolate egg. Such a gift is not only interesting, but also very tasty. And if you put sweets or small toys inside the egg, it will become just like store-bought, only much better.

To prepare the egg you will need:
- 10-15 bars of dark chocolate
- 10 white chocolate bars;
- cream injector;
- filling mold or balloon;
- a pair of rubber gloves;
- deep plate, spoon.
You need to decide what will be used for filling - a special silicone or plastic mold, consisting of two halves, or a ball. Of course, it’s easier to work with a ready-made form. But to find it, you will have to go shopping or order it online. The ball is a cheap and accessible replacement, but working with it will require care.
The egg will harden in the refrigerator, this must be taken into account: if the surprise turns out to be too large, it may not fit between the shelves.
Cooking an egg in a mold
First you need to prepare the chocolate mass. To do this you should:
- Break the dark chocolate bars into small pieces, place them in a deep bowl and place it in a water bath.
- Stir with a spoon or spatula until the chocolate has completely melted. The mass must be removed from the heat and allowed to cool to room temperature. It should be viscous and homogeneous.
- Fill the syringe with cooled chocolate and apply the chocolate evenly to the walls of the mold.
- Place the mold in the refrigerator for 1-1.5 hours.
- While the chocolate in the mold is cooling, melt the white chocolate.
- Remove the mold, fill the syringe with white chocolate and cover the sides of the egg with a second layer. You should try to touch the mold with your hands as little as possible so that the chocolate does not melt from their heat. Be sure to use gloves.
- Place in the refrigerator again for 1 hour.
- The finished egg ladles need to be removed from the mold and a surprise placed in one half. Wash toys and other inedible gifts first with soap and water and rinse with clean water.
- Heat a spoon in hot water and run the back side along the edge of the egg halves, connecting them.
- Use the remaining dark chocolate to coat the joint area so that the halves stick together.
The egg is ready. To achieve complete resemblance to a factory Kinder Surprise, you should wrap it. For this you will need foil. From it you need to cut two pieces in the shape of an egg, adding 10 cm to them from the edges. Place the egg on one piece and fold the edges. Place the second one on top and press lightly. Stick the inscription “Kinder Surprise” on top, and sweet gift ready.
Cooking an egg using a ball
To cook an egg you will need a durable ball without patterns. It needs to be washed and dried from the inside (this can be done conveniently with a hair dryer). Prepare the chocolate mass and start creating the egg:
- Remove the tip from the syringe and pull the ball onto it. Pull out the plunger and inflate the balloon to the desired size.
- Using a spoon, pour the chocolate into the ball.
- The filled ball must be carefully tied and rotated until the chocolate is distributed evenly over the walls.
- The ball should be placed on a plate with its tail facing up.
- Prepare white chocolate.
- When the ball hardens, remove the workpiece.
- Cut off the top, remove the ball, being careful not to damage the walls of the egg.
- Distribute white chocolate along the walls, making sure to spread the top as well.
- Place in the refrigerator again.
- Place a gift into the finished egg, connect and seal the halves.
- Pack the kinder surprise as in the first preparation option, or come up with your own packaging option.
Watch the video on how to make a large chocolate kinder surprise with your own hands:
Big egg with a surprise, prepared by hand loving mother or grandmothers - best gift for a child.
Probably, almost all of our readers are familiar with “Kinder Surprise” - a chocolate egg with a surprise, containing inside a plastic container with a toy or souvenir, which are developed by both our own and invited designers. Over the many years of the existence of this brand, such chocolate eggs have been produced by many companies around the world.
(Total 15 photos)

1. Trademark owned by the Italian company Ferrero. The production of chocolate eggs by this company began in 1974.

2. The inventor of Kinder Surprise was the Swiss designer Henry Roth, who came up with the idea of creating a chocolate gift with a surprise inside.
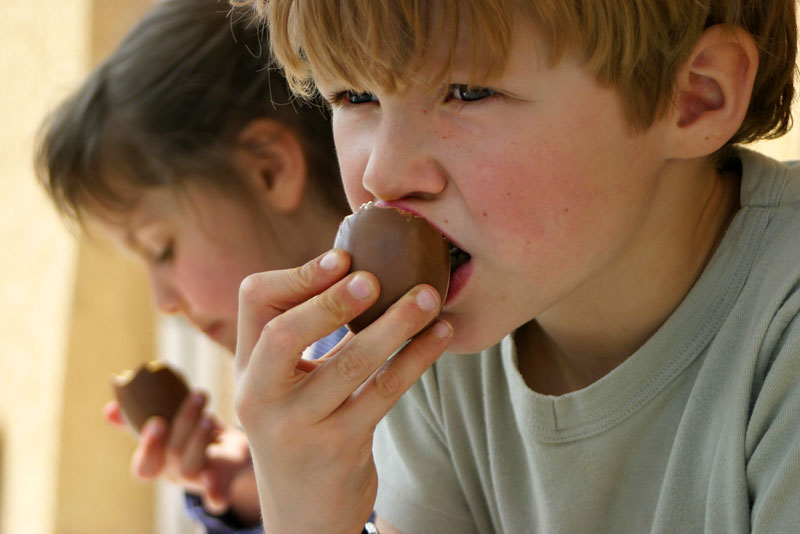
3. Kinder surprises are sold and bought on 5 continents in 60 countries.

4. The entire line of Ferrero products for children is called Kinder. It is for this reason that the word “kinder” is an integral part of the name of the chocolate egg. But the second part of the name, the word “surprise” is translated into its analogue, depending on the country where it is sold. Thus, Ferrero’s chocolate eggs are called “Kinder Uberraschung” in Germany, “Kinder Sorpresa” in Italy and Spain, “Kinder Surpresa” in Portugal and Brazil, “Kinderoverraskelse” in Sweden and Norway, “Kinder Surprise” in England, Well, in Russia - “Kinder Surprise”.

5. For countries with hot climates, Kinder Surprise eggs with toys inside are produced by Ferrero in a less “fusible” version called Kinder Joy.

6. By now, “Kinder surprises” have become popular not only among children, but also among adults who collect toys made from these eggs. Collecting has acquired quite serious proportions. At online auctions, prices for rare types of toys can exceed 1,000 euros. In February 2007, at an eBay auction, a collection of 90 thousand toys was sold for 30 thousand euros.

7. In Russia, 93% of the population aged 4 to 50 years know about Kinder Surprise.

8. In addition to Kinder Surprise, the Ferrero company produces candies, dragees, cakes, pastes, chocolate, bars: Ferrero, Raffaello, Fiesta, Nutella, Duplo, Tic-Tac and so on, so on...

9. The Kinder Surprise chocolate egg is prohibited from sale in the United States, where a 1938 federal law prohibits the inclusion of inedible items in food.

10. The total weight of the egg is approximately 35 grams.
Everyone good day
I very rarely write food reviews, but I couldn't help but ignore this one. huge Kinder, which was presented to me as a gift. Until this moment, I periodically observed it in the store, but spend 1500 rubles(that’s exactly how much it costs in the Victoria store) I couldn’t even afford 220 grams of chocolate.

By the way, the weight of a regular Kinder chocolate egg is 20 grams, and the price is about 60 rubles, therefore, 220 grams (i.e. 11 pieces) of such eggs would cost 660 rubles, which is still more than 2 times cheaper than this miracle, the size of a human head.
This is what it looks like compared to my head

Today I want to tell you what kind of egg it turned out to be and what was inside it.
Country of Origin- Italy, weight- 220 grams, price- 1500 rubles.
📌 Packaging
Like regular chocolate kinders, this egg is packed in foil packaging. In this case, the foil turned out to be denser and stronger (for that kind of money), and it was also well fastened together.
The packaging itself is bright, beautiful, in the usual Kinder design.
There is an abundance of information on the packaging in different languages, information in Russian about the manufacturer and importer, composition, expiration date, as well as precautions regarding the toy.

📌 Chocolate egg

The chocolate egg turned out to be very thick, but it still crumbled, so I couldn’t separate the halves nicely. It differed slightly in design from the usual kinder - the outside of the egg was ribbed.

In addition, the inside of the egg was very sloppily made, the chocolate had streaks, and not an even glaze.

Everything else was the same - milk chocolate on the outside, white chocolate on the inside.

I put the toy aside for now.
The composition is generally the same as other chocolate eggs. But there is simply an abundance of sugar in the egg, it lies primarily in the milk chocolate that covers the egg, and also in large quantities found in white chocolate.
The egg tastes sweet, tender (the chocolate literally melts in your mouth), but a little cloying- the abundance of sugar makes itself felt. I was able to eat it only with a lot of tea - chocolate makes me very thirsty.
I have a terrible sweet tooth, but even it took me three days to eat this huge egg.
📌 Toy

The toy was in a large, bright package that looked more like a pill. I was dissatisfied with the packaging - it was made of very soft plastic (although even ordinary kinders now use thick plastic), and, secondly, even my 22-year-old aunt had difficulty opening it. A child definitely wouldn’t be able to cope with this.


Inside there was an unassembled toy in a durable plastic bag, stickers and all sorts of brochures. It's not hard to guess that I had an egg with a toy from the Despicable Me collection, so I got a minion. The stickers were also with minions.


The toy did not contain small parts, and I assembled it quite quickly.


I got it minion traveler with a backpack. The toy itself is made and painted with high quality. The toy is static and does not spin at all. In addition, it turned out that it was not very stable and was only supported by the backpack.

The inside of the backpack is empty. It is supposed to be used as a pencil holder. But it is very small, and pencils fall out of it. Therefore, I decided to include all sorts of small things like jewelry, buttons and coins.

