DIY baby book for kindergarten from paper- an educational game for the little know-it-alls who really want to learn, but it’s still too early for them to read and write, but looking at pictures and learning a lot of new things is the time. Every mother knows that creativity has a positive effect on the development of a small child, which is why in kindergarten teachers work with children, and parents at home work with their children to create an appliqué book.
DIY children's book baby for kindergarten
Interesting DIY baby book for kindergarten- this is educational material for a little kindergarten student, which a mother can create on her own. The main thing is to come up with an interesting topic for educational crafts, design the composition and choose the material to use. For a child of every age, you can choose an interesting topic for a book and suitable material, for example, for kids from junior group Textile crafts are best suited, and for older students you can choose cardboard and paper.
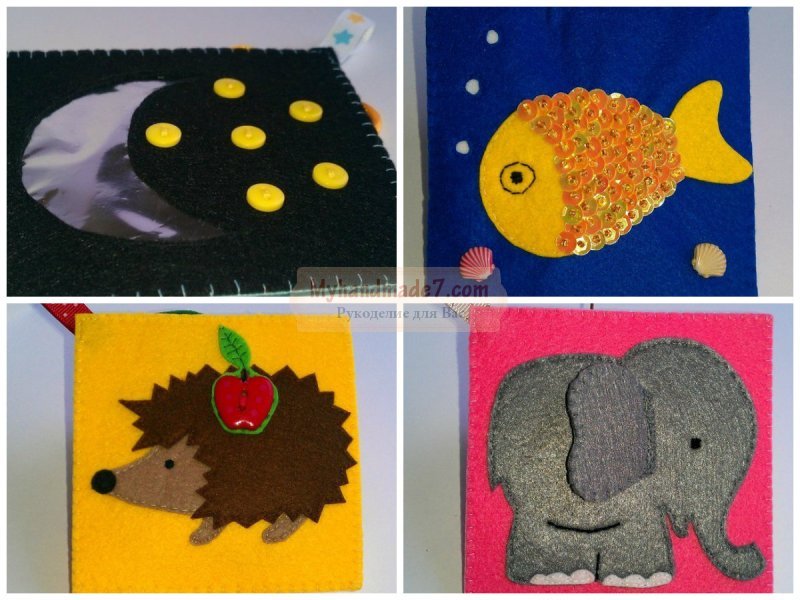
The baby book for the little ones is aimed primarily at developing fine motor skills of the fingers, so they are made from fabric and felt, adding various three-dimensional elements - zippers, buttons, felt figures, large beads etc. For children who are learning or have already learned to read syllables, such an educational book can be a mini-primer with letters, syllables and pictures corresponding to the theme.

The simplest paper options are made in the manner of a transformer, where the sheets are folded and glued together, and then the pages can be unfolded into a long strip with tasks and pictures. This is the easiest way to make a book by involving children in the creative process. This option is suitable if the teacher asked the children and parents to do joint work. You can choose the most simple and interesting topics for children - “Seasons”, “Animals”, “Favorite cartoons”.
Moms who decide to make a developmental book can stitch the spine with thread, you can also make holes on each page with a hole punch, and then tie all the pages with a ribbon or connect them with rings, following the example of plastic office document folders. If you connect the book with rings, you can add another page at any time. In addition, for such a book you can choose not only cardboard, but also felt and fleece, which allows you to make the educational craft colorful and multifunctional.
Interesting DIY baby book for kindergarten
DIY baby book for kindergarten for a child three years old can be made of felt. And this material was not chosen by chance, but for practical reasons, because felt pages will last longer. A child can accidentally wet them, but the book will remain intact and its appearance will not be affected. The felt book can even be washed if necessary.
To promote the development of tactile sensations, when developing a booklet, it is advisable to use various materials according to the invoice. In fact, it is not at all necessary that the child reach kindergarten age; his first acquaintance with such a developmental book can take place as early as the age of one year.

A book for young children should not contain small, easily detachable parts that can be easily torn off and, as is traditional, put in the mouth. This may lead to undesirable consequences. It is best to use different textures of materials, different fabrics to the touch, and other materials, for example, films and dense polyethylene.
There must be appliqués on the pages of children's educational books, but for the little ones you need to choose simple figures that are well known to them from childhood. early age. You can make an applique of the sun and a tree, a house and a car, flowers and butterflies.
This applique is perfect for girls: kitchen furniture and attributes with opening cabinet doors, images of products and kitchen appliances. Plates and teapots sewn from felt can be made with Velcro so that they can be separated from the pages if desired. This book can also be used in games with dolls.
If you designed it yourself, then you probably still have felt figures that can now be used to decorate the book.

DIY baby book for kindergarten
Growing up, a child can not only play with a book, but also take part in its creation. Now the content of the pages can be movable and easily separated. For a child who studies in secondary and senior group, you can add small and large buttons, braids of thread, ribbons and laces to the pages. Now, in addition to scenes and pictures, you can add letters and numbers.

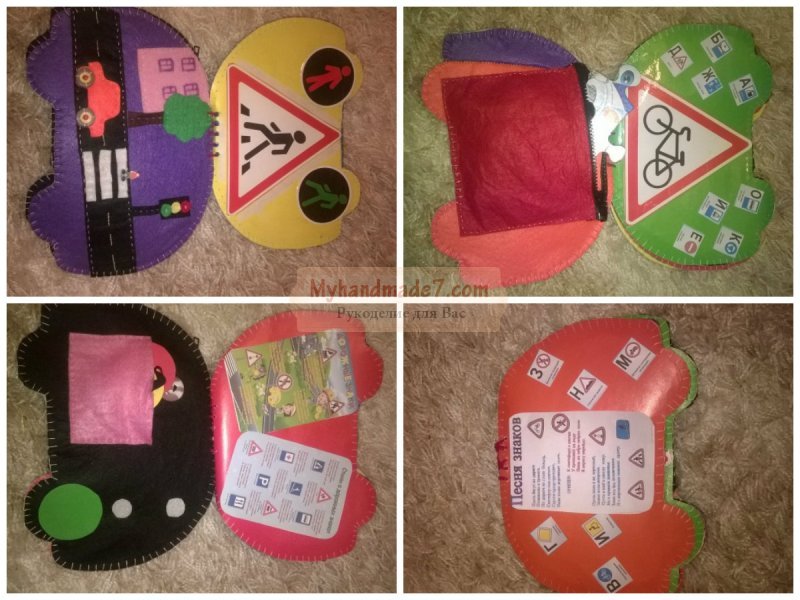
A moving picture can also become an element of the plot. Boys will love this theme, because you can play with the rules traffic with cars and traffic lights.
4 years old is the time for a child to learn to tie his own shoelaces, and the learning process will arouse great interest in the child if done in a playful way. That is why one page can be made in the form of a shoe with laces. For this page you will need iron rings that are larger than the laces so that the kids can get into them easily. In the same way, sometimes one wall is functionally decorated: locks with keys, latches and hooks are attached.

The original can teach you how to carefully fasten a zipper ladybug, in which a small zipper will be located between the two wings. We know very well the love of children for “adult activities”; they will show great interest in lightning and will tinker with it for a long time. You can also make secret pockets on the zipper, inside which prizes or other interesting tasks will be hidden. DIY baby book for kindergarten with various tasks the child will be interested in every day, and for several years he will be happy to play with it both in kindergarten and at home.

Girls love to play with dolls, but they always get lost, as do their outfits and accessories, and you can put everything together in one book, where the pages will have doll appliqués, and dresses and outfits for them can be changed with Velcro. And you can make hair from threads, and if you wish, you can make different hairstyles - make curls or braid hair.

DIY baby book for kindergarten for a 3 year old child
DIY baby book for children development can be carried out by the most in a simple way- made of paper, with stitched pages. Children can work on such a craft on their own, and parents will always come to their aid. The most interesting topics for children are, of course, cartoons and fairy tales, any cartoon characters.
You can make a book together with a 6-year-old child; all you need to do is prepare sheets of colored paper and glue. When the blank is ready, you can glue a paper applique to each page. In addition, joint creativity between parents and children is an exciting and fun process, and educators often give tasks for such joint creative time.
Choose a topic that is interesting to children and at the same time educational. If you read fairy tales to your children at night, and they already know various fairy-tale characters, then your book may be called “A Journey Through Fairy Tales.”
You need to prepare in advance multi-colored sheets of cardboard, scissors and glue, and also a thin ribbon to connect the pages. Double-sided tape, which can be used instead of glue, can also come in handy during the work process. It will be easier to glue paper applications to double-sided tape without worrying that the glue will protrude beyond the boundaries of the paper elements.
You will also need a color printer that will help you print selected fairy-tale landscapes, pictures and scenes. If you don't have a printer, you can use children's magazines. Sheets of cardboard must be folded in half and the edges trimmed in a semicircle using curly scissors. Cutting out the cardboard will fall on the shoulders of the parents, but cutting out the paper elements with curly scissors can be entrusted to the children. They will be happy to do this simple activity.

Along the fold line of all paper pages, approximately in the middle, two holes should be made into which you can thread a ribbon to connect all the pages. The ribbon on the outside must be tied into a bow.
When the blank for the book is ready, you can decorate it with fairy-tale motifs and landscapes; your child’s favorite fairy-tale characters will appear on the pages. Separately, you can print out riddles based on fairy tales or excerpts from your favorite fairy tales, which can be glued next to the pictures. Be sure to make a beautiful cover with an inscription.

DIY baby book for kindergarten made from paper
DIY baby book for kindergarten for a 3 year old child is a unique educational toy that combines many different functions. This includes education, the development of fine motor skills, and the development of imagination. In English, such a felt toy is called a quiet book, because while the baby is captivated by this educational game, the house is very quiet and calm, and the mother has time to relax. But first, you need to start creating such an educational game yourself, and you don’t even need sewing skills for this. Felt can be sewn with hand stitches, so it is not necessary to use sewing machine.
First you need to think about the theme and arrangement of elements on the pages. For the first time, you can take any of the proposed examples, and very soon you will be able to develop your own felt book design.
For letters and figures, you should select templates in advance and print them on paper, only then transfer them to felt and cut them out. It is not at all necessary to sew all the additional elements of the felt applique tightly; they can be attached with fasteners and Velcro, attached with ribbons and elastic bands.
It is not surprising that working with felt will captivate the craftswoman, and you will definitely want to make other crafts, toys and decorations. For example, for a matinee, you can make felt as an accessory to a fancy dress costume.
You can make a colorful book for kids yourself.
To do this you will need the following available materials:
- photo;
- paper;
- cardboard;
- textile.

With the help of such homemade products you can develop your children.

There are 3 types of homemade books:
- paper version;
- photo books;
- educational books made of textiles.

Homemade book made of cardboard or paper
In the photo of a children's book intended for a baby who is not yet a year old, you can see large subject pictures. It's best to group images by topic.

You can make various books for a one-year-old baby. Each of them can be dedicated to one of the topics: “Pets”, “Food”, “Toys”.

Knowing how to make a children's book with your own hands, you will quickly make it. The little one will definitely be interested in an educational story about what his favorite bear does. A series of pictures shows the baby how the bear plays with a ball, eats delicious honey, walks in the forest, sleeps on the bed.

Where do you get thematic pictures from?
The necessary images can be found in various sources:


Pictures from coloring books can also interest a small child. The baby is attracted to colored images and uncolored ones.

Large pictures are on the pages of magazines. Suitable images can be found on the Internet. They are easy to print on a printer. If you use photo paper, you will get high-quality photographs.
Pictures from wall calendars are also suitable for handmade crafts. At the end of the year, you can ask your friends for a calendar.

Arm yourself with pencils and paints. Draw yourself! Your little one will appreciate every creation.

Take photographs of various objects or phenomena yourself to create a unique book.

Having shown your Creative skills, you'll soon be able to create a homemade library.
Note!


Making a kind of encyclopedia of the surrounding world for the development of the baby
Option 1. Homemade book from a photo album
You need to purchase a 10X15 photo album with 36 pages, this is the best option. Choose small dimensions; do not take bulky photo albums. Take cardboard and cut out strips of white cardboard with dimensions of 10X15.
All that remains is to stick the pictures on the cards and insert them into the album. If the cards are laminated, they will last longer.

Subject images with inscriptions in a photo album are not just a book for kindergarten.

If its design is complicated, it is suitable for older children. This book can include children's stories, riddles and fairy tales.

Option 2. Homemade book in a file folder
For the product you will need to purchase a file folder and A4 size cardboard. Pictures are glued onto white or colored sheets. The finished cards are inserted into a folder.

Note!

The sheet may contain one image and a short story based on the picture. Another design option is to place a signature under the picture.

Option 3. Homemade book from drawing sheets
For a book you need to take 8 or 10 sheets, fold them in half, and then sew them together. You can connect the sheets in another way - make holes using a hole punch, thread a satin ribbon and tie it.

Thematic pictures are pasted into the finished book. This product has the only drawback - insufficient strength.
Option 4. Book in the form of an album
You can make a homemade craft from a sketchbook. The thematic picture must be glued to the cover. You can include your baby’s statements, his first stories, or children’s songs in the book.

Children's educational photo books
A book for a child with photographs will help the child move from everyday conversations with parents to the perception of literary works. Here the child already needs coherent speech. Simply naming the item is no longer enough.

You can paste a photo of yourself and your child. The first page serves as the cover; the title and author's name are written on it. An image is also pasted here, from which it is easy to guess what topic the book is dedicated to.
Note!


Text is written into the book and placed in different ways. The photo can be pasted on top or on the left page of the spread, and information can be placed below the photo or on the right side.

Soft fabric children's book
The master class “How to make a children's book” will help you create a real masterpiece. Elements that attract the child’s attention can be used here: squeakers, bells, appliqués, lace-up or Velcro fasteners.
Soft books help develop tactile sensations. They are made from materials of various textures: fleece, wool or velvet.

Additionally, various fillers can be used. The most popular options include small pebbles, beads, peas or seeds.

DIY photo children's book


Armed with magazines, scissors, glue and markers, we decided to make with your own hands not just a collage, but books and paintings. And we killed several birds with one stone: we had a creative and interesting time, practiced fine motor skills and, most importantly, received a new instrument that encourages our youngest son to recite poetry. I also remembered how much kids and even older children enjoy making books themselves. Even for those who don't really like to write. But first things first.
Why make books with your own hands?
Before I talk about how easy it is to make a book with your baby with your own hands, I’ll tell you why this is necessary. It would seem that now you can find any book on sale. But... Sometimes the pictures are just terrible, sometimes there is too much text on one page for kids, sometimes... you just want to be creative.
A few years ago, my eldest son and I also became interested in making books with our own hands. It was at the dacha and almost nothing has survived (which is a pity). And I completely forgot how interesting it was for him and the children from the neighboring houses to make books themselves, both based on poems, and just like that, for several weeks in a row, they asked me every morning if we were going to make books today.
In fact, for kids to understand that they can not only read books, but also make them themselves, and this is not at all difficult, is simply a breakthrough. It is then impossible to stop them. They make books based on poems, fairy tales, and invent their own stories. You will only be required to give a poem or an idea for a book and help with the choice of illustrations (if you are making books with appliqués rather than drawing illustrations), so that this process does not take too much time and the children do not lose enthusiasm.
The youngest son has been making us his books for several days now, and then he reads them to us himself. Of course, they have no artistic value; I was even embarrassed to photograph some, but that’s not the point. The main thing is creativity and creation.

What you will need
In order to make the simplest book with your own hands you will need:
- sheets of paper or cardboard;
- a poem with visual images;
- pictures that match the images of the poem;
- scissors;
- glue;
- felt-tip pens or pencils for design.
It's better to use double-sided paper or cardboard so you don't have to glue the pages together. You can also use regular printer paper, but it is still better to take thicker paper or cardboard, since they do not warp so much from the glue and the markers do not show through to the other side.
Choose a poem whose images you can easily find in the magazines you have or draw. Since it’s winter outside, we took winter poems. If you have a color printer, you can select suitable pictures for the poem on the Internet and print them.
Some pictures can be replaced with words (especially useful if you are teaching your child to read) or drawn by yourself.
Our DIY winter books
I. Vinokurov
Snowfall
Snowfall,
Snowfall.
It was a day
And a night in a row.
He walked through the field
He walked through the forest
I also looked under the awnings,
He may rest in peace
At home,
And we realized:
Winter.

G. Novitskaya
Mittens
Lost
At my sister's
Two fluffy mittens!
To mom
Tata complained:
-They galloped away like rabbits!
They galloped away
Straight into the forest.
Even a trace of them
Disappeared!

O. Chusovitina
It's snowing outside the window,
So soon New Year.
Santa Claus is on his way,
It will take him a long time to get to us
Through the snowy fields,
Through snowdrifts, through forests.
He will bring a Christmas tree
In silver needles.
Happy New Year to us
And he will leave us gifts.

Tired of the mess in your nursery? Tired of endlessly collecting toys for your child?
N. Kalandarova
Fluffy snow lay on the branches,
Children playing on the porch:
They sculpt a woman under the window,
They roll a snowball together.

When will the baby be able to do this on his own?
The process of creating a book with your own hands is excellent: practicing fine motor skills, thinking develops, including creative thinking, the baby learns to be attentive and diligent. You can make the simplest books with children starting at the age of 1.5 years. At this age, the baby will be able, under your strict guidance, to smear the necessary area with glue, stick a picture there and even smooth it out with his finger. You can use colored glue so that the baby can see exactly where the picture needs to be glued.
After 2.5 years, you can ask your child to help you arrange the pictures in the right order. Closer to 3 years, with your help, the baby can draw the picture himself (you can hold the baby’s hand in your hand or, conversely, guide the sheet with the picture). At 4 years old, if you give your child a base for a book, cutouts and glue and a little guidance, your child will make a book himself. And a 5-year-old is quite capable of finding suitable pictures in magazines and cutting them out himself.
More options
Another option for creating books with your own hands with kids is not to glue pictures, but to draw them. Together with your child, you break the poem into small pieces, and the child makes an illustration for each piece. When making such books, we assume that the baby will “read” them himself, so it is better if the pieces are the same size: a line, two lines or a stanza for those who are older. This way you teach your child to see the picture of the poem, and this way the poems are better remembered.
For the little ones, it is better to take quatrains and break them into lines. While the baby turns the page, he will have time to say the phrase. This is what prompted my youngest son start reciting poems. Before this, I couldn’t encourage him to do this in any way, although I suspected that he knew many poems by heart (he corrects me if I say something wrong), and speaks well for his age.
Closer to 3 years, you can make one picture for two lines, after 4 years - one picture for a quatrain.
You can make your book like a real one and paste both a picture and text on one spread. This way, your book can be read by those who are unfamiliar with it. After 5 years, if the baby can already read, give him a big, serious task: you paste text on the spreads of the book (for a poem into parts, in this case, focus not on the baby’s age, but on his reading skills), and let the baby select and paste the pictures or draw them. Such a book, made with your own hands, will become a great gift grandma or grandpa.
You can make books from white paper or cardboard, or you can use colored paper or cardboard. A few notes from our experience:
- do not use too bright colors and a motley background: they are tiring and your drawings and clippings will be difficult to see;
- on bright paper or cardboard, you can glue a square or rectangle of white paper so that only the frame remains, and draw or glue on this white piece;
- books with frames look very beautiful and neat, so if your book has white frames on the pages, you can simply draw them;
- very comfortable colored paper for a printer (it's double-sided, but a bit thin: don't use too much glue and it won't warp too much, but markers will show through);
- Glossy double-sided paper for creativity does not always stick glossy pictures well, but it is denser than ordinary colored paper for appliqués;
- Double-sided cardboard is not always easy to find or is too bright.
You can also experiment with book forms:
- the pages of the book can be different lengths- in the shape of a ladder;
- make the pages of the book not the usual shape, but for example, in the shape of a semicircle, or in the shape of a drop or a cloud, if you have a book about rain;
- the pages of the book can be the colors of the rainbow, you can alternate the colors of the pages;
- add pockets, windows and other secrets to the pages.
My eldest son and I made this rainbow book for our youngest son for his first birthday (the spreads of the book are in rainbow colors). Although the book is made of cardboard sheets glued together, the pages of the book are covered with tape, since it was actively used during feeding:

Or you can make not books, but paintings - illustrations for poems. This is what we got.
V. Lunin
Winter
In the picture of winter
Everything is white from snow:
Field, distant hills,
Fence, cart.But sometimes they shine on it
In the middle of a cotton clearing
Red-breasted bullfinches
Sun spots.

Of course, homemade paper books, if they are not laminated and covered with tape, quickly fail. You can't chew them like cardboard books. But you can always make new ones! And it takes very little time!
Have fun creating with your children!
If you liked our creative ideas, tell other moms and dads about them by clicking on the social media buttons.
Do you and your baby make books with your own hands? Share your experience in the comments!
Hi all.
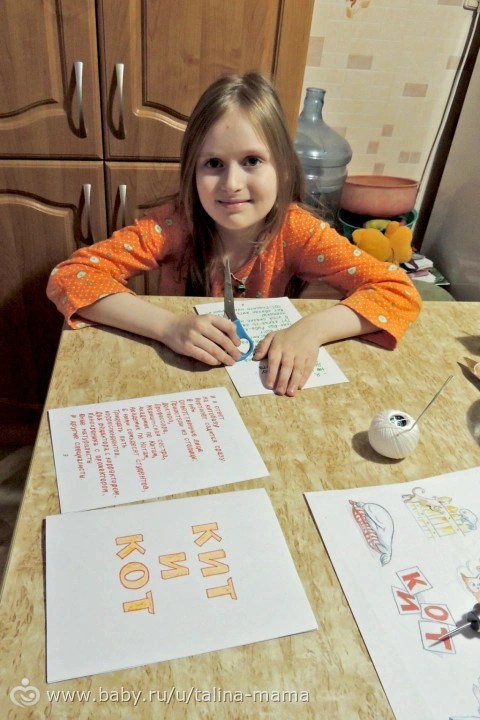
On Tuesday, my daughter came home from school with an assignment - to make a baby book with her own hands (an assignment on the surrounding world, they took book printing). The assignment is for a week, that is, it is due next Tuesday. At first they spent a long time deciding which work to take - the task was small, you can come up with your own, or you can take something well-known. We decided to make a book by B. Zakhoder “The Whale and the Cat”.
I’ll tell you what happened step by step, and in the middle, watch the master class on covers for notebooks/books and the like (I promised it sooooooo much, I never got around to it, but here’s a reason). For those who have been with me recently, the book was sewn together with Coptic binding (aka a hand-made version of book binding), I had a manual for it somewhere in a magazine, or in the handicraft community, I don’t remember, I’ll have to look for it.
To begin with, I created a layout in Photoshop, printed out the text and pictures in a light gray font, because my daughter wouldn’t have written THAT amount of text entirely by hand, and it wouldn’t have been smooth at all.


Today, when she finished writing, we started creating the book itself, not forgetting to also print out additional illustrations.
We needed iris threads, a large gypsy needle, an awl and scissors.

To begin with, fold all three sheets in half, carefully ironing the folds.
After that, they took another blank sheet of paper, folded it in half, unfolded it, and picked up a ruler and pencil. We retreated 3 cm from both edges and put marks every 2.5 - a total of 7 marks.

After this, we sequentially inserted a piece of paper with marks into each of the three sheets with text and pierced holes on the fold from the inside along the marks.


I inserted the needle only into the very first hole - then my daughter sewed it herself, I controlled the process and suggested which hole the needle should be inserted into next.

When we sewed all three “notebooks” (slang for “sheets folded together for stitching”), my daughter was very surprised and said “how is that all done???”

Not without a second, terribly disturbing “assistant”

As a result, after my request to smile, I had to take two dozen shots, of which one was more or less successful

This is what the “block” looks like - the inside of the book after stitching.

I’ll show you where to use the remaining tails later, but for now I’ll just show you what the same stitched book looks like from the inside.
It's inside the notebook.

And this is between the “notebooks” - there are gaps left, there is no need to put them anywhere, they will not be visible later.

Since the block is stitched, let's start creating the cover. Well, and, accordingly, further there will be a detailed MK .
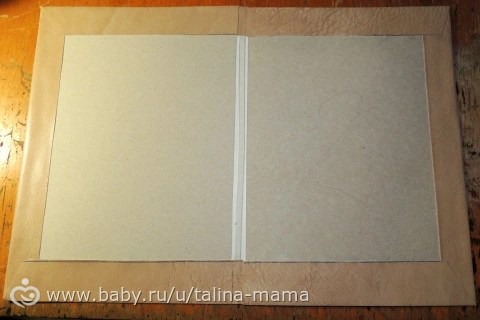
We choose what the cover will be made of. We had paper vinyl (such a special paper, you can google it), you can take thick paper, you can even take thick wallpaper, fabric - whatever your heart desires and what you have enough experience for - the easiest way is to start with regular thick paper (density from 180 g/m2 ).
We cut out 2 identical parts from cardboard, so that the cover is 1-2 mm larger than the inner block along the top, bottom and one of the sides (the density of the cardboard depends on your wishes, at least 300 g/m2 for sure, if you need straight hard cover - about 600-700 is needed only if it is not beer cardboard - I don’t remember the numbers for it, but it only comes in one density).
The third part should be equal in height to the first two, and its width is the thickness of the innermost part plus 1-3 mm (depending on how thick the inner part is, if 5 mm, then the middle of the cover is 6 mm, if the thickness is 5 cm, then the middle of the cover and 5.5 cm will do fine).
We lay the cardboard on the “fabric” (I remind you that I have vinyl vinyl, if you have a different material for the cover, just keep this point in mind), cut off the excess part of the “fabric” so that there is 1-2 cm for the hem on each side. And don’t forget to leave 1-3 mm between the middle cardboard and the sides.


First, we roughly lay out the cardboard so that the top and bottom are the same distance (a couple of mm won’t make a difference). We mark this out for ourselves with dots, remove the cardboard and draw the GREEN line using a ruler. It is important that the green line is straight, parallel to the top and bottom, otherwise everything will be skewed.
It is better to immediately glue the middle cardboard along this red line (if it is narrow, then by eye, if it is wide, we find its middle and combine the top and bottom points with the red line).
Next will be the most difficult thing, in which you can get confused, so I immediately recommend - attach cardboards - immediately label them and put the corresponding numbers/letters/signs on the “fabric” itself on which they were lying. Because if somewhere you made a mistake even by 1 mm and they are not exactly the same, then mixing them up when gluing them is almost like death. Therefore, I wrote the number 1 on a cardboard, removed this cardboard, wrote the number 1 under it on the “fabric”, and did the same with the second cardboard.
Next, we carefully combine the cardboard (first one, then repeat everything for the other) and the existing green line. We retreat 1-2 mm from the middle cardboard and outline the side cardboard on both sides - in the picture these are BLUE lines .
We remove the cardboards again. And mark the cutting lines. So that you don't get confused and don't move your mouse back and forth, I duplicate the picture that was above.
PINK lines
Via YELLOW lines we cut out the corners, this is unnecessary, we don’t need them (relative to the blue lines the angle should be no more than 45 degrees, optimally about 30, but I do it by eye).
After cutting out the corners, we sequentially glue the side cardboards, focusing on the green and blue lines (in the photo below they are black, I was too lazy to switch colors).

By the way, the choice of glue depends entirely on what you use as “fabric” - it is best to glue leather and paper of any kind with PVA (just use construction grade - it’s thicker and dries faster), and the same fabric, especially dense ones, with glue the moment is transparent (for example, silicone). Just don’t take any instant glue - you’ll just ruin everything - you won’t even have time to apply it, but you also need to spread it evenly.

My daughter actively participated in all stages of the production of the book, so when the middle cardboard was sealed, the jamb at the bottom is very visible, but oh well, but almost herself)))
Actually, first the cardboards themselves are glued, then they are covered with “fabric” by folding it (if it is any type of paper, first press and iron it without glue, it’s easier to glue).
Moreover, they are glued first long sides- with them there can be the most jambs, and only then we try to hide these jambs by gluing the short sides.

Actually, the MK can safely be finished here - all that remains is to put the cover under the press and leave it to dry.
Well, my daughter and I, while our cover was resting under the press, glued the inner block. This is done for several purposes:
- this way the block becomes stronger, pages cannot be torn out by accident,
- “notebooks” stop moving up and down relative to each other (you can sew them together more tightly, but then it turns out to be too tight and not beautiful after gluing)
- the holes between the “notebooks” are filled.

It is important to glue the block with the same glue that was used to glue the cover, so this time we use Moment Crystal glue.
Since our block is thin, I simply pressed the tails to the block, when the block is thick (at least 1 cm or more) - be sure to coat it with glue first, let it dry a little, coat it a little again, put gauze/bandage on top and coat it with glue again - like this the block becomes a single whole.

The main thing in this matter is not to overdo it - otherwise the glue may leak inside and partially glue the pages together.
This is what the block looks like from the inside after gluing (I didn’t open it wide, but it still needs to dry for much longer than 15 minutes).
This is between the “notebooks” - where there was emptiness - now there is glue.

Well, inside the notebooks I’ll show you how my daughter stitched it.

We waited until the adhesive dried and began the final “finishing off.”
This is what the book looks like if you put the inner block into the cover.
“Something is missing,” my daughter told me. That's right - the flyleaf is missing. So we took two more thick sheets of paper, folded them in half and put them on the cover.

It is very important that the endpaper recedes from the edge of the cover, that is, it completely coincides with the side of the side cardboard that is closer to the middle. Glue one side of each endpaper to the cover.

That is, so that the flyleaf would then open, but one side would hide all the fear and horror of the cover. 

First, we mark a line beyond which the glue should not tread. I wrote the dimensions of this space above. Since our book size is A5, I made an indent from the edge of about 1.5 cm. On the other side, the same thing.
Then successively and very quickly apply glue to the already glued part of the block, to the middle cardboard of the cover and to the designated parts of the block (the same 1.5 cm from the edge). And we press the cover at the same time with the end against the cover and the endpapers against the block on the sides.
We hold it like this for a minute to 5 minutes (depending on the type of glue), and then again do your favorite press. Let the book dry under pressure. From half an hour to infinity - the longer the better.
Well, my daughter and I remembered that we had some illustrations left unused, so we had to urgently cut them out and glue them on with a glue stick (I hope they won’t fall off tomorrow).
And this is what happened in the end:
the book is closed (the inscription will appear on the cover tomorrow)


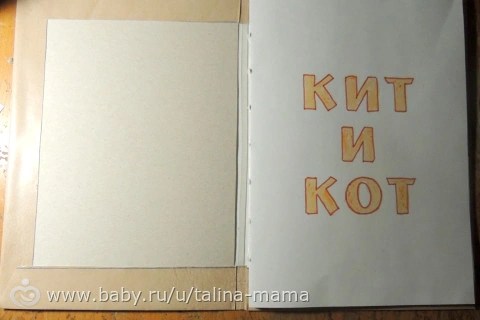
The first page (which is glued to the endpaper - the endpaper is smoothed a little by hand)

Pages 2-3

Pages 4-5 (formed by two different “notebooks”, this is almost invisible in the finished book)

Pages 6-7 (sorry, the whole picture didn’t fit, I just had to take the helicopter)

Pages 8-9 (pictures just begged to be here, but there was nowhere to put them, alas)

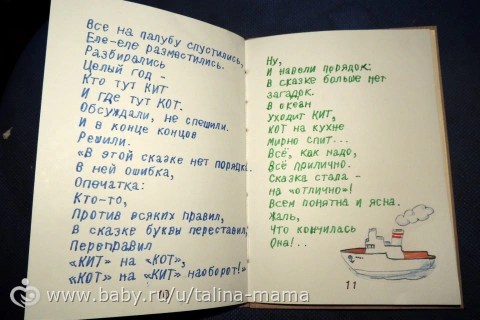
Pages 10-11
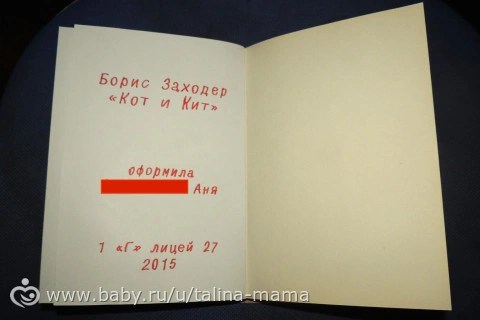
Page 12 (“imprint” and flyleaf)
Thank you all for watching)))
If you have any questions, ask, I will try to answer them to the best of my ability.
P.S. I’m incredibly happy with my daughter, she really did it herself under my strict guidance, I expected it to be in the spirit of “bring it, give it, don’t disturb it. It's nice to make SO mistakes in children))))
P.S.S. Inappropriate comments will simply be deleted - I have neither the energy, nor the time, nor the desire to listen to the nonsense of idiots.


