The latest gift trend is the tree of happiness. This is a winner for most holidays. No exception is New Year when such a gift is more than appropriate.
Tools and materials Time: 3 hours Difficulty: 4/10
- flower pot;
- alabaster or plaster;
- stick or unnecessary pencil;
- ball for base;
- decorative details for decoration;
- glue gun

The tree of happiness is also called topiary, so our New Year's tree of happiness can still be considered a New Year's topiary.
You will need:
- massive flower pot;
- foam;
- small Christmas tree decorations;
- large and small beads;
- double-sided tape;
- glue gun;
- sweets, preferably round;
- cling film;
- crepe paper;
- newspaper;
- shiny mesh;
- toothpicks;
- kebab skewers;
- primer base, varnish and acrylic paint.
How to make a New Year's topiary:
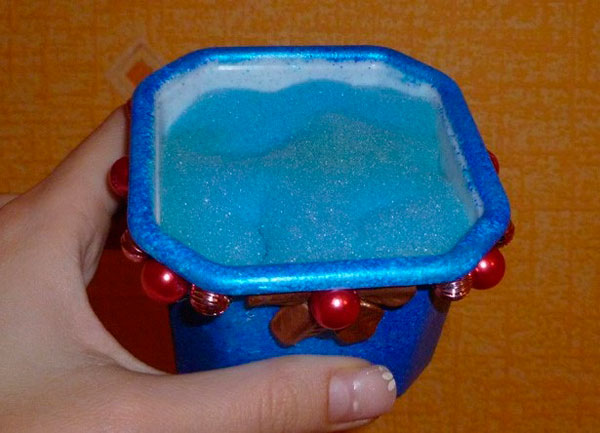
Apply primer to the flower pot, and after it has completely dried, apply paint. Then dry and varnish. That's it, our pot is ready.

We lay out an ornament from beads and fix it with a glue gun.

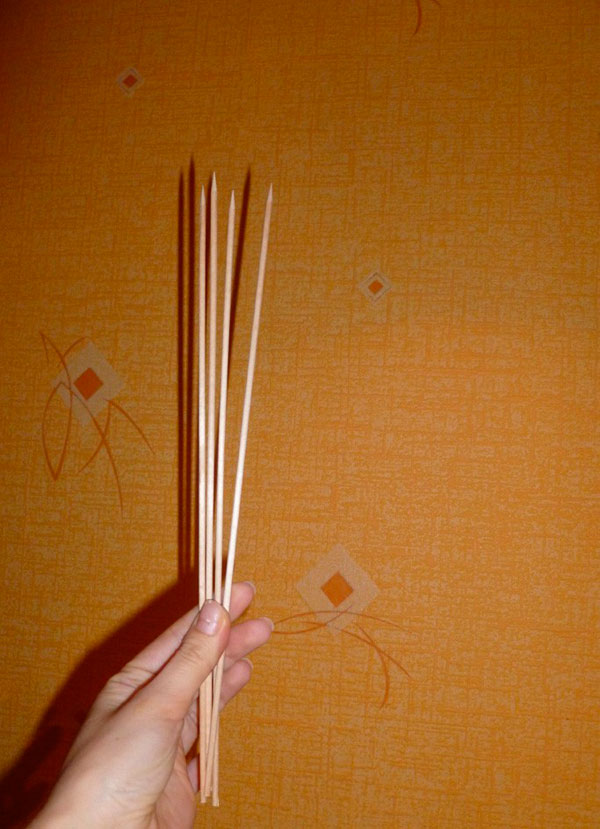
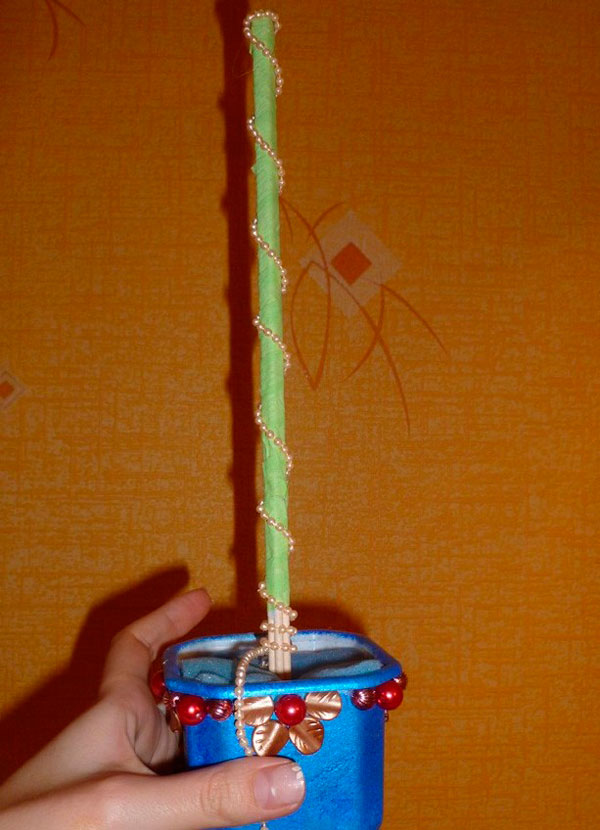
We take 5-6 skewers, wrapped with double-sided tape, and on top with green paper for the barrel.

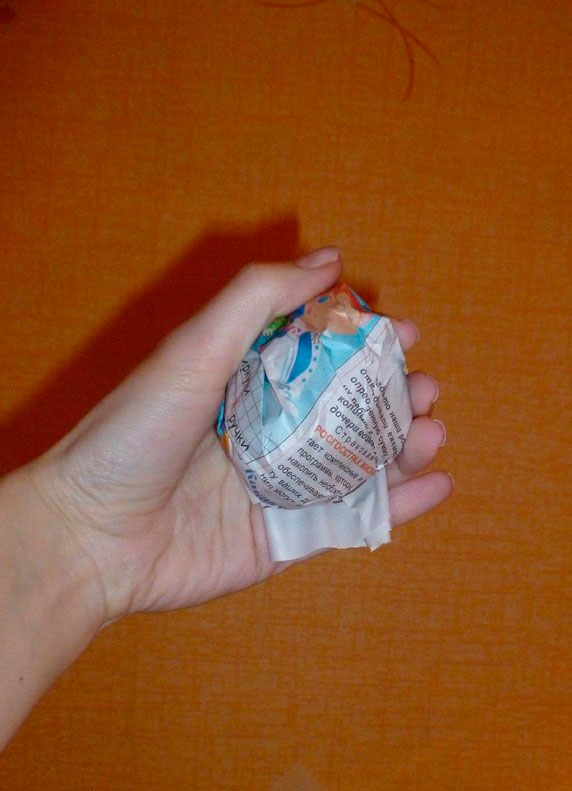
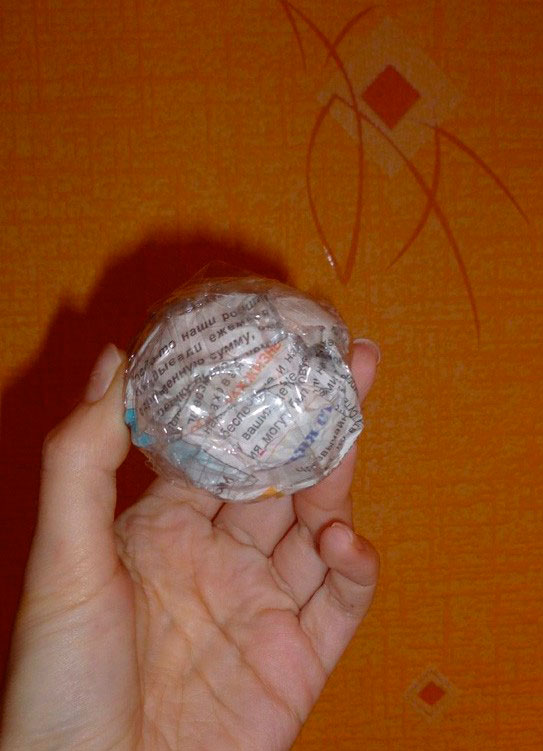
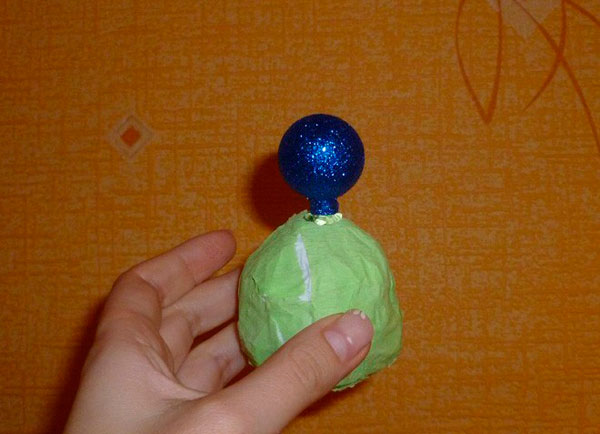
We make the base - a ball from newspaper, you can take a ready-made ball, for example, plastic or foam. Then you need to cover it with tape and wrap it well with paper.

Carefully cut off the tops Christmas decorations, attach the decorations using a glue gun, evenly distributing them over the surface of the ball.


Fill the pot with foam rubber.

We put the barrel in foam rubber. We secure the thread with beads along the entire length of the barrel with a glue gun.
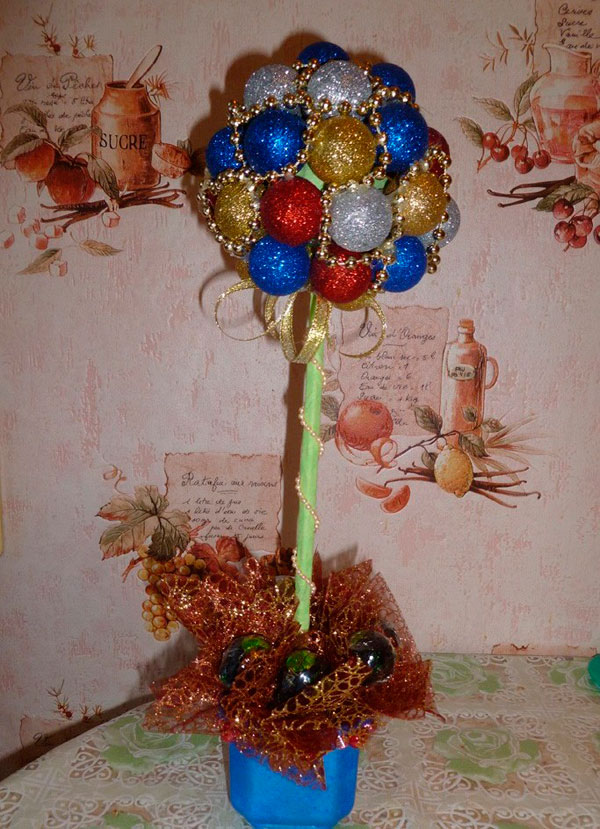
We place a ball with toys on the barrel and carefully fix it with glue. We decorate the junction of the ball and the barrel with ribbons.

We fill all the gaps that remain on the ball large beads, fixing them with glue.

Now you need to decorate the foam rubber. For this purpose, take candies, insert toothpicks into them and wrap them around cling film, securing it with tape.


We cut out squares from the mesh and attach them with tape to the blanks, which we insert into the foam rubber.


Our New Year's tree of happiness is ready!
Christmas tree topiary
Tools and materials:
- stick for the trunk;
- screwdriver or drill;
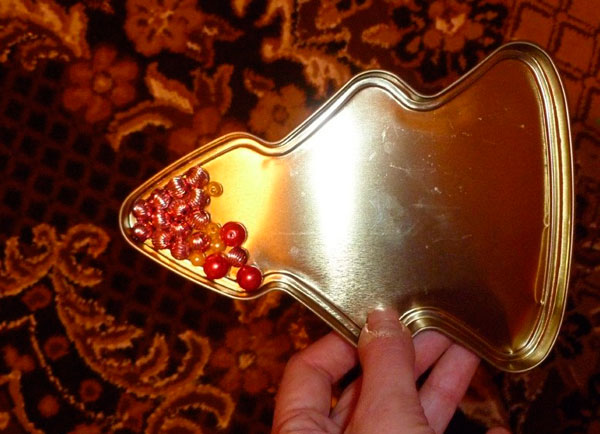
- beautiful tin box;
- spruce branches;
- glue gun;
- gypsum;
- PVA glue;
- gold paint;
- beads.
How to make a tree of happiness
We paint the stick gold. Once it's dry, we make holes. The distances between them should be 1 cm.

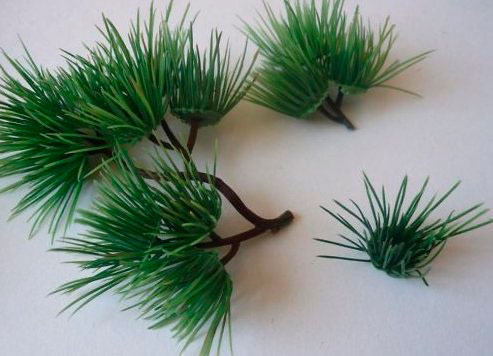
We attach small spruce branches with glue to the trunk, inserting them into the holes.

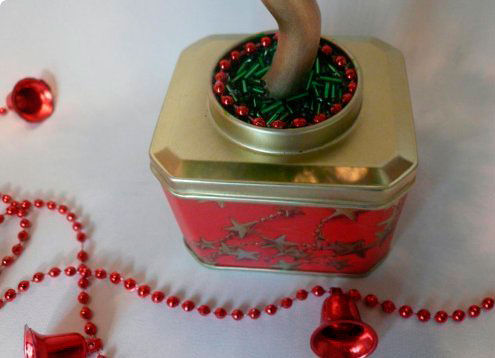
We put the tree in a box. After this you need to plaster it thoroughly.
Leave to dry for 2-3 days. After this, we cover the plaster with PVA glue, and make one layer of beads on top. After it dries, make another layer of glue and add another layer of beads.
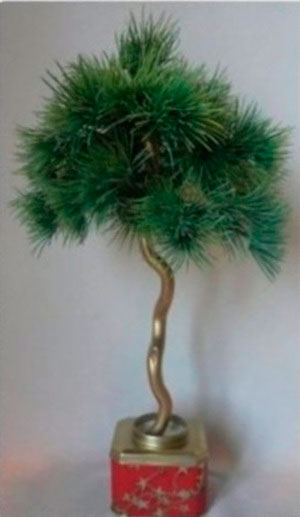
We decorate the green branches with gold cones and, of course, multi-colored balls. That's it, our Christmas tree topiary is ready!

Mandarin tree
Materials:
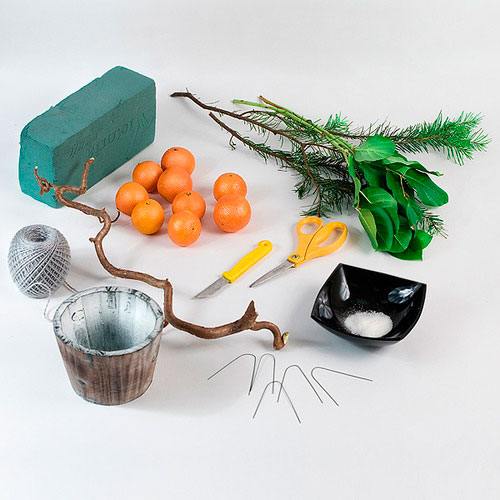
- tangerines;
- laurel and spruce branches;
- stick for the trunk;
- white beads;
- wire;
- threads;
- pot;
- sponge for flowers.
How to make a tangerine tree
Make a ball from a sponge and fill the pot with it.
Cut the wire into 10 cm pieces. We wrap the tangerines with thread.

Spruce branches are generously greased with glue and sprinkled with white beads.

We place the bottom of the stick in the pot, and place a sponge ball on top. We stick a wire with tangerines into it. And between them are laurel leaves, folded in half. We decorate the bottom with spruce branches.

In principle, the tangerine tree is ready.

Alternatively, instead of laurel leaves, you can take multi-colored rain, cotton wool or serpentine.


May the process of making Christmas trees bring you pleasure, and the fruits of your labor bring you happiness in the New Year!
You can also see how a New Year's tree of happiness is made in the bonus video.
I bring to your attention a master class on making topiary for the New Year holidays.
Here are the materials we will need to make topiary:
- a foam ball (in this case, 9 cm in diameter);
- corilus (this is a wavy branch) about 30 cm long;
- sisal fiber dark green;
- natural buds;
- Christmas decorations;
- decorative tangerines;
- cinnamon sticks;
- artificial spruce branches.
And among the tools - a glue gun and rods for it:

Flowerpot. My flowerpot is decorated using decoupage technique, you can take any other that suits the style.

And gypsum plaster:

So let's get started.
1. We need to insert our corilus branch into a foam ball. To do this, use a knife to dig out a small hole with a diameter suitable for our branch and a depth of approximately 2-3 cm.

We heat up the glue gun, fill the hole with hot glue and insert our twig into the hole with glue. We wait for the glue to cool, and at this time we hold our structure so that everything sticks evenly. This is what you should get:

2. We begin to paste over our ball, glue the balls first, at approximately the same distance from each other, I got 6 balls:

3. Then we glue our cones, also at approximately the same distance from each other (the cones should be well dried, if you collected them yourself, if they are damp, they will not stick):

4. The next step is to glue the decorative spruce branches:

5. Then we need to roll the following balls from sisal fiber:

To do this, pinch off a bunch of sisal and roll it into a ball in your palms. You need quite a few of these balls; to be honest, I didn’t count how many, but I put them in a large cup, and I got a full cup.
6. Then we fill the empty spaces on our future topiary with these balls. We also glue them with a glue gun. This is what we should get:

7. Our next step will be decoration - gluing tangerines, cinnamon sticks and other decorative elements suitable for the New Year theme:

Well, it looks like we’re done with the ball.
8. Then we need to “plant” our tree in a pot. To do this, put the tree in a pot and cover it with crumpled newspaper so that it becomes slightly stable, but there is still room for plaster:

9. In an unnecessary container that you don’t mind spoiling (mine is a mayonnaise concrete container), mix the solution, pour water a little at a time into the dry plaster and knead until the consistency of thick sour cream.

10. Carefully place the solution in the flowerpot with the tree. At the same time, use a stick to tamp down the newspaper and crush it inside the flowerpot. Due to the fact that there will be newspaper inside, the weight of the topiary will not be too large.

Where we get stained with solution, we wipe it off immediately so that it doesn’t dry out. And we put it in a corner for support and stability. We look at it from all sides and correct it so that our tree is even. And leave it like that until the solution hardens, usually for two hours.

When the solution has completely hardened, you can decorate the flower pots.
11. First we will cover the solution with sisal. To do this, take a larger bunch of sisal and roll it into a “sausage” with your hands.

Then we evenly coat the surface of the frozen mortar with glue, using this glue because the glue gun does not stick to the cement surface.
12. And glue our sisal sausage in a circle, starting with the winding of the barrel and then increasing the radius of the winding to cover the entire surface. Press with your fingers to make it stick better.


13. After the sisal has slightly stuck, you can proceed to the final step - decorating the flowerpots:

And this is what we should end up with!

I hope my master class will be useful to someone, I wish you all creative success and inspiration!
Report to moderator
New Year's topiary. Master class with step by step photos.
Author: Tatyana Eruslanovna Tyagina, teacher kindergarten No. 7 Kiselevsky urban district, Kemerovo region, Russia.
The master class is designed for older children school age, teachers, parents and people involved in creativity.
Purpose: This master class is intended for making a tree of happiness - a topiary, which can serve not only as an interior decoration, but also become an excellent New Year's gift.
Target: making New Year's topiary from improvised materials.
Tasks: familiarize yourself with the technology of making topiary, develop creative imagination and fantasy; instill aesthetic taste, develop hand motor skills, perseverance; cultivate accuracy when performing work.
Initially, topiary was a garden with decorative trimmed plants and sculptures created from artistically trimmed trees. The art of topiary has a long history. Thus, even in Ancient Egypt and Persia, the ability to give geometric shapes to bushes and trees was valued. And the most famous example of a topiary garden is the Hanging Gardens of Babylon in Babylon - one of the seven wonders of the world. And now topiary (or European tree) is the name for small original trees, for the production of which natural and artificial materials are used. Topiary is decorative in nature, and what it will be made of depends only on the author’s imagination. And the size of topiary can be from 10-15 centimeters to half a meter.
Materials and tools for making New Year's topiary: not a large pot, a branch or stick 40 cm, newspaper, thread with a needle, plaster, artificial white fur, Christmas tree beads, artificial pine branch (brush) sold by the meter, wire cutters, scissors, glue gun, Moment glue, decorative green and red, red bow, decorative silver branch, pine cones, white gouache or corrector, various New Year's mini toys.
Progress:
1. We make the base for the topiary: we form a ball with a diameter of 10 cm from newspaper and wrap it with threads for strength.

2. Make a hole in the ball, insert a branch and secure with hot glue. We wrap the branch with green braid.

3. Fill the pot with diluted plaster and immerse the base of the topiary in it. You don't have to wait long for the plaster to harden.


4. Decorate the trunk of the topiary with Christmas tree beads using glue.

5. Let's start making the topiary crown. Using wire cutters, cut the artificial pine brush into 17 cm pieces. My topiary took 40 of these pieces. It all depends on what diameter your ball is.


6. Bend the pine pieces in half.

7. You get these fluffy lumps.

8. Using hot glue, attach the pine fluffy lumps tightly to each other on the ball. You need to start from the bottom of the ball.

9. It turns out like this crown.

10. Now let’s decorate the crown of the topiary. For this you will need: cones, corrector or white gouache, various New Year's mini-souvenirs, a decorative silver branch.

11. Cover the tips of the cones with a corrector (you can use white gouache).

12. Glue the painted cones between the pine branches.

13. Glue New Year’s mini toys along the crown.

14. Glue decorative silver branches between the pine branches. Cover the tips of the pine needles with corrector or white gouache.

15. Let's start decorating the pot. For this you will need: white faux fur, red braid, large silver beads, a couple of New Year's mini toys (gifts), pine brush needles.

16. Cut out a “fur coat” for the pot from white fur. The pattern depends on the shape of your pot.

17. Sew the darts together and use hot glue to secure the “coat” to the pot. We tie the “fur coat” with red braid and decorate it with a bow.


18. Place pine needles in a pot, then beads and gifts.


19. Lovely New Year's gift ready for friends and family.
New Year is a wonderful time when we remember everything that happened last year, set goals that we want to achieve next year, congratulate our family and friends, and give gifts. But what to give to your loved ones? After all, you want something unusual and original, so that the gift stands and evokes pleasant memories of the giver. One of original gifts can become a topiary - a “tree of happiness,” as it is sometimes called.


But how to make a gift topiary for the New Year? In this article we will make a New Year's topiary with our own hands using a master class.
Photos will be attached to the work to make it easier for you to work and the manufacturing process more visual.
Materials for creating a New Year's topiary
- tangerines.
- a skein of linen rope (can be bought at any gardening and flower shop).
- a flower pot from which our tree will actually grow (you can also use any container, decorating it to your liking).
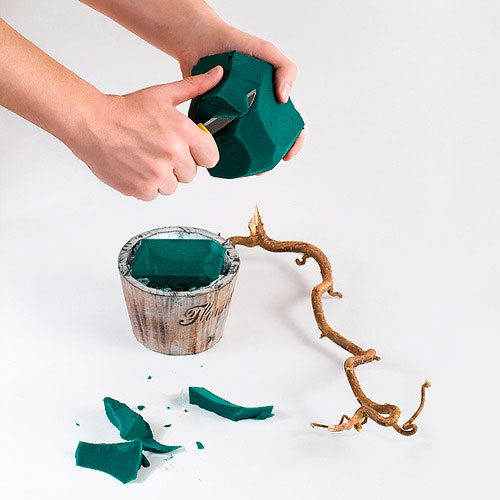
- a beautiful branch or driftwood, strong enough to withstand the weight of tangerines. Treated, varnished twigs can be found in a florist shop.
- scissors and a paper knife.
- a piece of foam plastic or floral oasis.
- spruce branches and mistletoe leaves for decoration.
- pieces of wire to strengthen the tangerines on the tree (a set of small hairpins will do).
- artificial snow (this can be crushed polystyrene foam or any other material, the main thing is that it looks like snow).
- brush for PVA glue.
Progress
1. Take tangerines and wrap them with rope crosswise. Be careful, wrap it tightly so that your tangerines do not fall out of the ropes. But don’t overdo it, otherwise you risk splashing the entire workspace with juice and damaging the product.

2. Coat the twig with PVA glue and dip it in “snow”, this is done so that the needles do not stick together.

3. Cut out a cone from polystyrene foam or oasis that will fit in the pot. To make the structure heavier, you can put a stone or a piece of lead at the bottom of the pot.
4. Please note that the pot must match the size of the entire composition, that is, be proportional.

5. Let's get to the most difficult and important part. We strengthen the branch in the oasis so that it does not dangle. We begin tying the tangerines one to the other, starting from the bottom. There will be fewer tangerines at the bottom, a little more in the middle, and the same number at the top as at the bottom. Then we decorate all this beauty with leaves and twigs.

New Year's topiary is ready. It will wonderfully decorate your table or be a wonderful gift for family and friends. And the New Year's mood that your craft will create either in your home or in the home of the people you love will more than pay off your efforts and perseverance. Be inspired by photo examples and have fun creating little “trees of happiness”!


Video on this topic
They will help you decorate your home and create the mood for an upcoming miracle and celebration. step by step videos master classes in which you will see other incredibly beautiful and attractive crafts that will retain the warmth of your hands and be able to transfer it to those who are dear to you.
New Year's topiaries are an excellent element in the festive interior.
To celebrate the New Year 2020, you can make some charming mini-trees with your own hands. It won't take much time, and the result will please the eye for a very long time. Below are a few best options New Year's topiary for 2020 with your own hands. According to the given instructions and step-by-step master classes You can duplicate the products or use them as a basis for creating your own version of the decoration.
Classic herringbone
Materials:
- base: small flower pot (or decorative bucket), plaster (cement or polyurethane foam);
- barrel: a pencil, or wooden sticks, or a “Chinese stick”, or a cylindrical ice cream stick, or a branch (it is desirable that the diameter be at least 5 mm);
- crown: a cone made of foam plastic (you can buy it at a decor store or make it yourself by cutting it from a rectangular parallelepiped of foam plastic), or from thick paper;
- decor: New Year's tinsel, small balls (you can use different colors), cotton wool;
- for fastening: tape (regular and double-sided), super glue (or glue gun), twine (any other thick thread).

Step-by-step master class:
- For the future crown, a ready-made foam or paper cone is used. To make a paper crown, you need to take cardboard and make contours on it.
You can print the template, or put a compass in the corner of the sheet and draw an arc. If there is no compass, use a pen with a thread tied to it. The free end of the thread is held at the corner point, the handle is pulled to the required length of the cone and an arc is drawn. The resulting cone is cut out and glued with tape along and across the connecting seam.
- In order to get a barrel, you need to take a straight stick or pencil. If the sticks are thin, then they are tied together to obtain a trunk of the required thickness. The trunk can be coated with paint or wrapped with twine or thread. There is no need to paint or wrap the entire trunk, just the part that will be visible is enough.

- The trunk is fixed in the base (flower pot) in a special hole, which is intended for water, using super glue. If there is no hole, then you can put a small piece of plasticine on the bottom and stick it into its trunk. To secure the base well, gypsum (cement or polyurethane foam) is poured into the pot.
Important! When working with polyurethane foam, it is necessary to take into account that it will increase in size.
- While the base dries, it is necessary to make the bottom of the crown. To do this, circle the base of the cone and cut out the resulting circle. You can use green cardboard. In its center you need to make a hole for the barrel. The base is glued to the cone with tape.
- The crown is placed on the trunk.

- Next, you should decorate the resulting Christmas tree. First you need to glue the balls with super glue or tape, distributing them evenly over the crown. It is better to use double-sided tape for this. With its help, tinsel is also glued: a piece of double-sided tape is placed on the top of the cone and the edge of the tinsel is glued to it. Next, they wrap it around the entire barrel, securing it with double-sided tape.
- The pot can also be wrapped in tinsel around the circumference, securing it with double-sided tape.
- To decorate the base, cotton wool is placed in the middle of the pot. You can use grain, or sawdust, etc.

- Additionally, the tree is decorated with a small star on the top, beads, and small gifts can be placed under the crown.
Fruit topiary
New Year's topiaries can not only be part of the interior, but also decorate festive table. To celebrate the New Year 2020, you can make a topiary dessert or.
Materials:
- base: a flat small plate and a large apple;
- trunk: long carrot;
- decor: kiwi, grapes, strawberries, carambola (cut in the shape of a star), orange and any other fruits, parsley or fresh mint leaves;
- Toothpicks are used to connect the decor.

Performance:
- The bottom of the apple is cut off so that its base becomes flat and stable.
- A recess is made in the upper part, matching the diameter of the base of the carrot. The “trunk” is inserted into it.
- Toothpicks (they should not be too long, so they can be broken) are evenly and densely stuck into the apple base and carrots.
- Next, fruits are strung on them. The voids and the bottom of the “Christmas tree” are decorated with greenery.
Topiary of tangerines
Another delicious New Year's topiary with which you can celebrate the New Year 2020.
Materials:
- base: flower pot, plaster (foam, cement);
- trunk: branch;
- crown: foam ball or round floral sponge;
- decor: small tangerines, green sisal;
- connection: PVA glue, toothpicks or skewers.

Step by step execution:
- Secure the branch in the pot using plasticine or a small piece of floral sponge. Fill with plaster (spray foam, cement).
- A floral sponge or foam ball is glued to the branch.
- Tangerines are attached to the ball using toothpicks or skewers. Fruits should be small in size so that they are securely attached and do not fall.
- The spaces between the tangerines and the base of the pot are decorated with green sisal. You can also use corrugated paper cut into strips.
Candy topiary
The principle is the same as in the previous version of topiary, only marmalades are used as decoration. Children really like these.
Materials:
- base: foam ball or cone;
- decor: marmalade candies (for a New Year's tree it is better to use red, green and white);
- fastening: toothpicks or skewers.

How to do:
The implementation of such topiary is quite simple: marmalades are pricked one by one onto the base using skewers or toothpicks. The length of the skewers can be adjusted using scissors or wire cutters.
A child will really enjoy making a tree like this. You just need to stock up on enough gummies, since in the process of creating a masterpiece, most of them can be eaten.
Pebble topiary
Materials:
- base: flower pot, plaster (cement or foam);
- barrel: stick;
- crown: foam cone;
- decor: pebbles (or large oval beads), paper napkins with a pattern in green tones, seeds (seeds, flax, grain, ready-made mixture for birds), twine or twine;

Master Class:
- Secure the trunk in the pot with plaster. You can additionally decorate the pot with a twine bow.
- Glue the cone to the barrel with PVA glue or a glue gun.
- Cut circles from napkins and wrap them around pebbles or beads. The napkins are glued well with PVA glue.
- Glue the stones to the conical crown (here it is more convenient to use a glue gun).
- Wrap the resulting Christmas tree with twine or string coated with glue.
- Pour grain into the pot. To prevent it from spilling out, PVA is first poured into it.
Balloon topiary
Materials:
- base: decorative bucket or flower pot;
- crown: foam rubber or foam ball, or round floral sponge;
- decor: small plastic ones, artificial Christmas tree branches or tinsel, decorated tape, snowflake stickers or stencils for snowflakes and white paint, silver paint;
- connection: PVA glue or glue gun.

Performance:
- Repaint the flower pot or bucket silver.
- After the paint has dried, stick snowflakes on it or paint them white.
- Cover the sides of the pot or bucket with decorated tape.
- Glue the ball to the base.
- Remove the fastenings from the New Year's balls and glue the balls to the ball.
- Decorate the spaces between the balls with tinsel or Christmas trees.
Video master class
How to make a New Year's topiary 2020 with your own hands:
Don't miss interesting news in photos:


Creative Wall Stickers
12 brilliant hacks for the home that will make life extremely easier
Interesting ideas for storing things, or how to do without cabinets


